


SageMaker Data Wrangler flow

이 중에서 New data flow 선택
로딩이 끝나고 나면, 기본값으로 Source와 함께 Transform이라는 항목이 보인다.
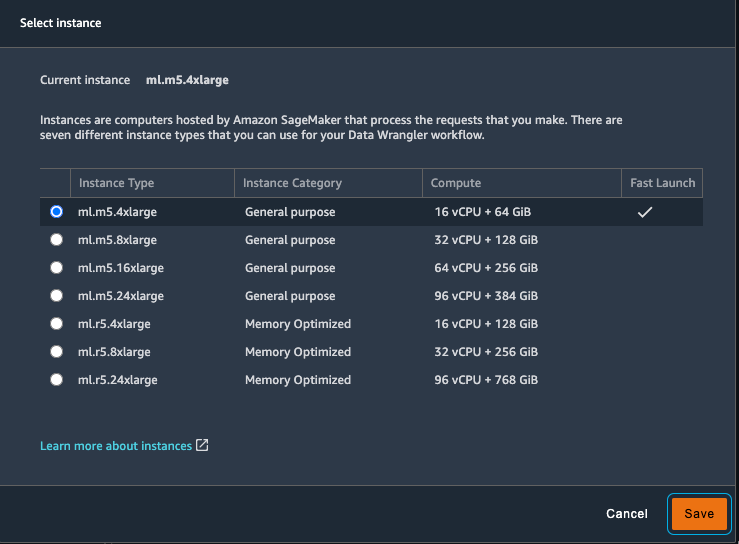
이때 활용하는 서비스는 Sagemaker 내의 Data Wrangler인데, Data Wrangler의 경우 미니멈으로 vCPU를 16개 RAM을 64GB나 사용하기 때문에 비용 정보에 신속하게 대응할 수 있어야 하고, 혹시나 켜놓고 놔두는 불상사가 발생하지 않도록 하자.
AWS에서 제공하는 Sample 소스를 추가하였다. 데이터는 타이타닉의 탑승자에 대한 정보이다.
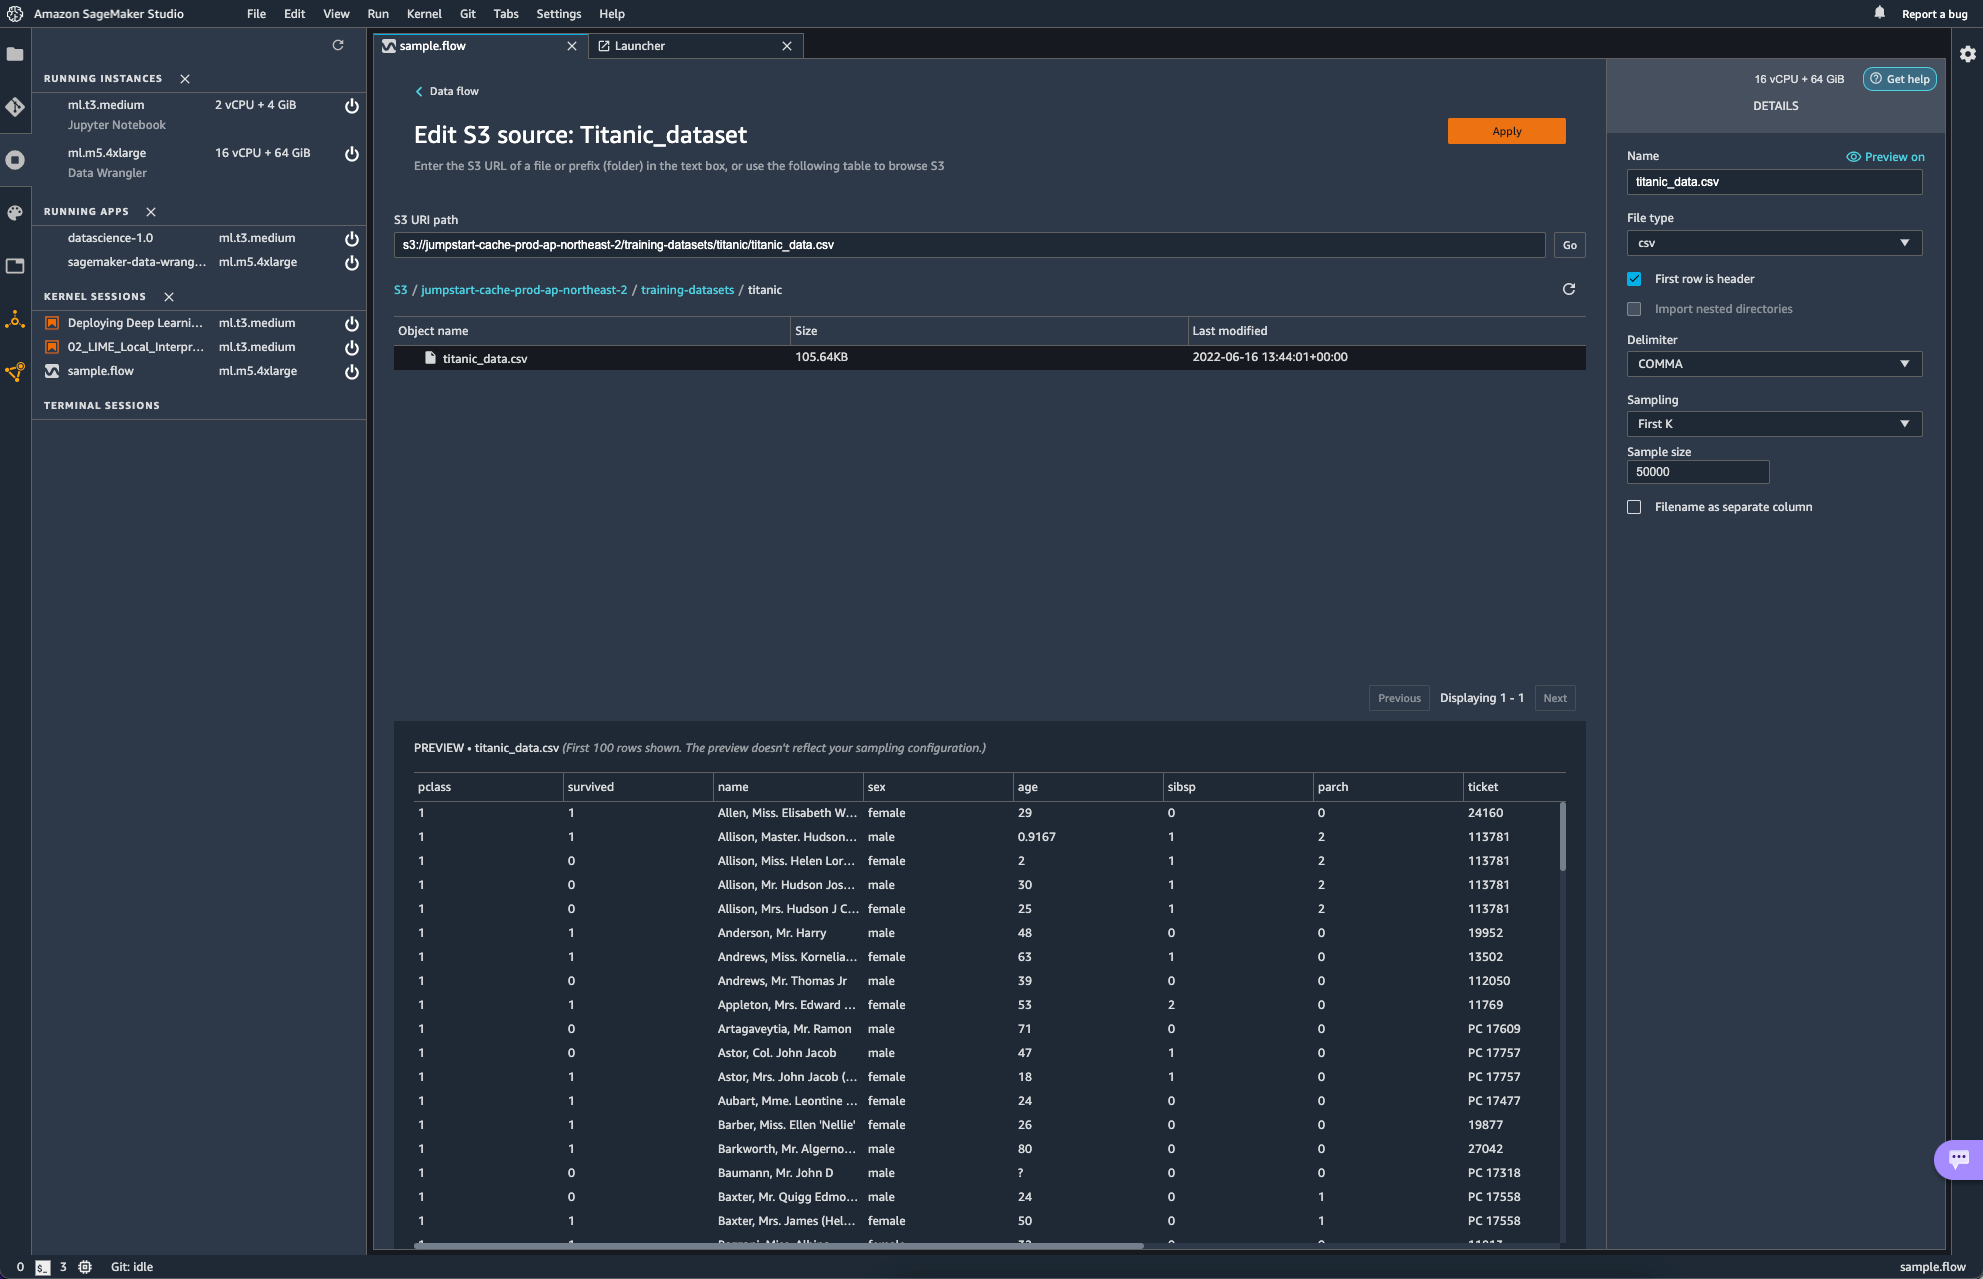
source를 edit하게 되면, 다음과 같은 화면이 보인다.
S3 URL을 통해 source를 지정하는 형식이다. Data Wrangler에서 유저는 파일 형식과, delimiter, 샘플링 방식과 크기를 지정해주게 된다.
이 외에도 쿼리 질의를 통해 데이터를 가져올 수 있는 Athena로부터도 데이터를 가져올 수 있다고 한다. snowflake로부터도 가져올 수 있다고 하는데, snowflake 사의 서비스를 아직 써본 경험이 없어 일단은 넘어가고자 한다.
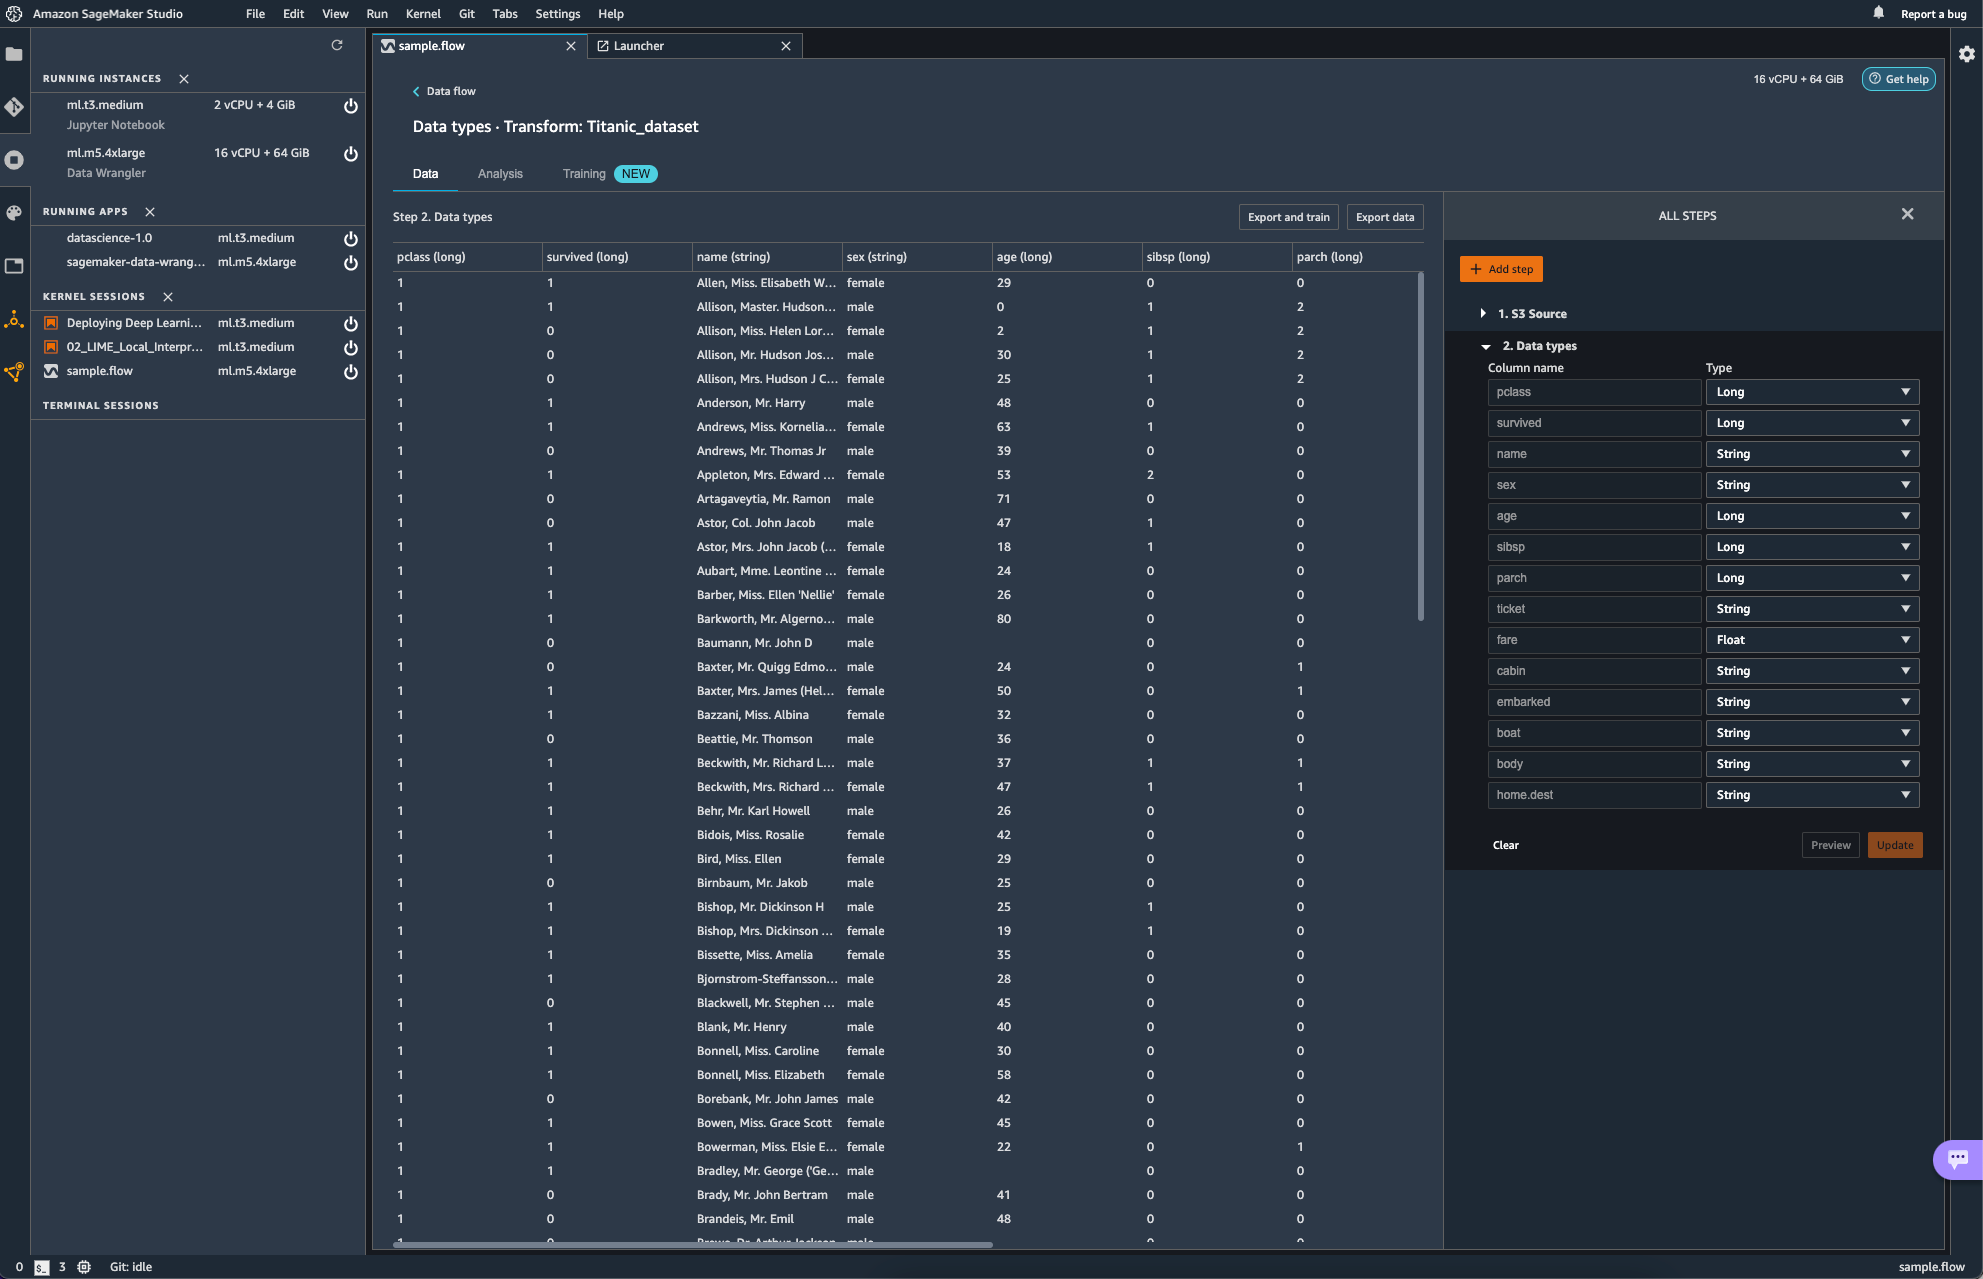
이미지 속에서는 작업은 Glue Studio에서 수행할 수 있는 ApplyMapping과 같은 역할을 수행한다. 일단은 신경 쓸 필요도 없이 자동으로 Mapping 되었다.
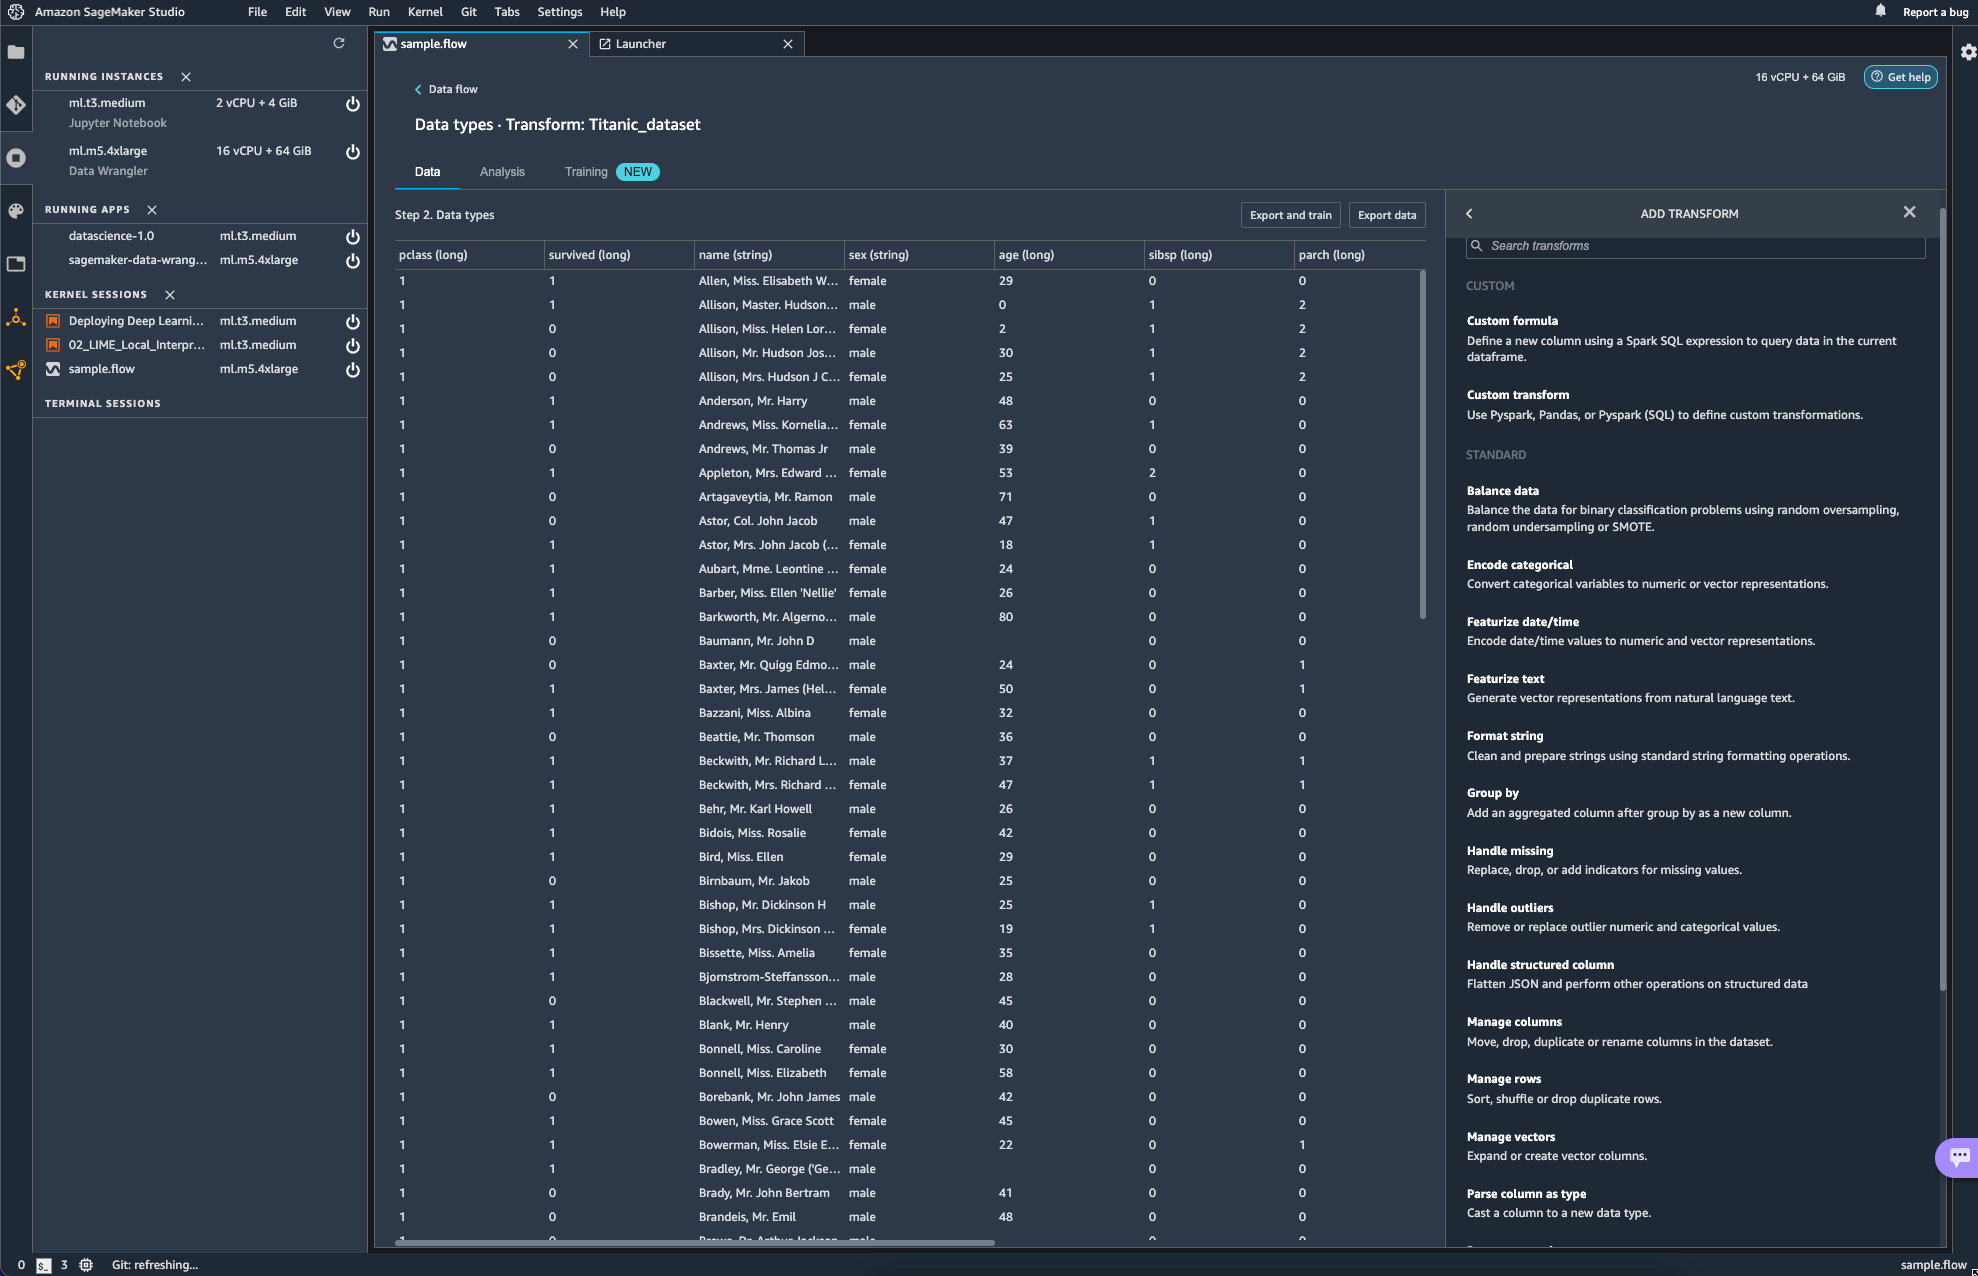
add step을 선택해보면 다양한 transform 작업들이 보인다. 해당하는 작업들이
transform에서는 glue studio에서 transform으로 적용할 수 있었던 항목들이 그대로 보여지는 듯 하다.
다만 이제 Glue에서 transform 했던 작업들의 성격이 ETL 측면에서의 transform의 느낌이였다면, sagemaker에서는 분석 직전에 데이터를 preprocessing하는 측면이라고 생각하면 되지 싶다.
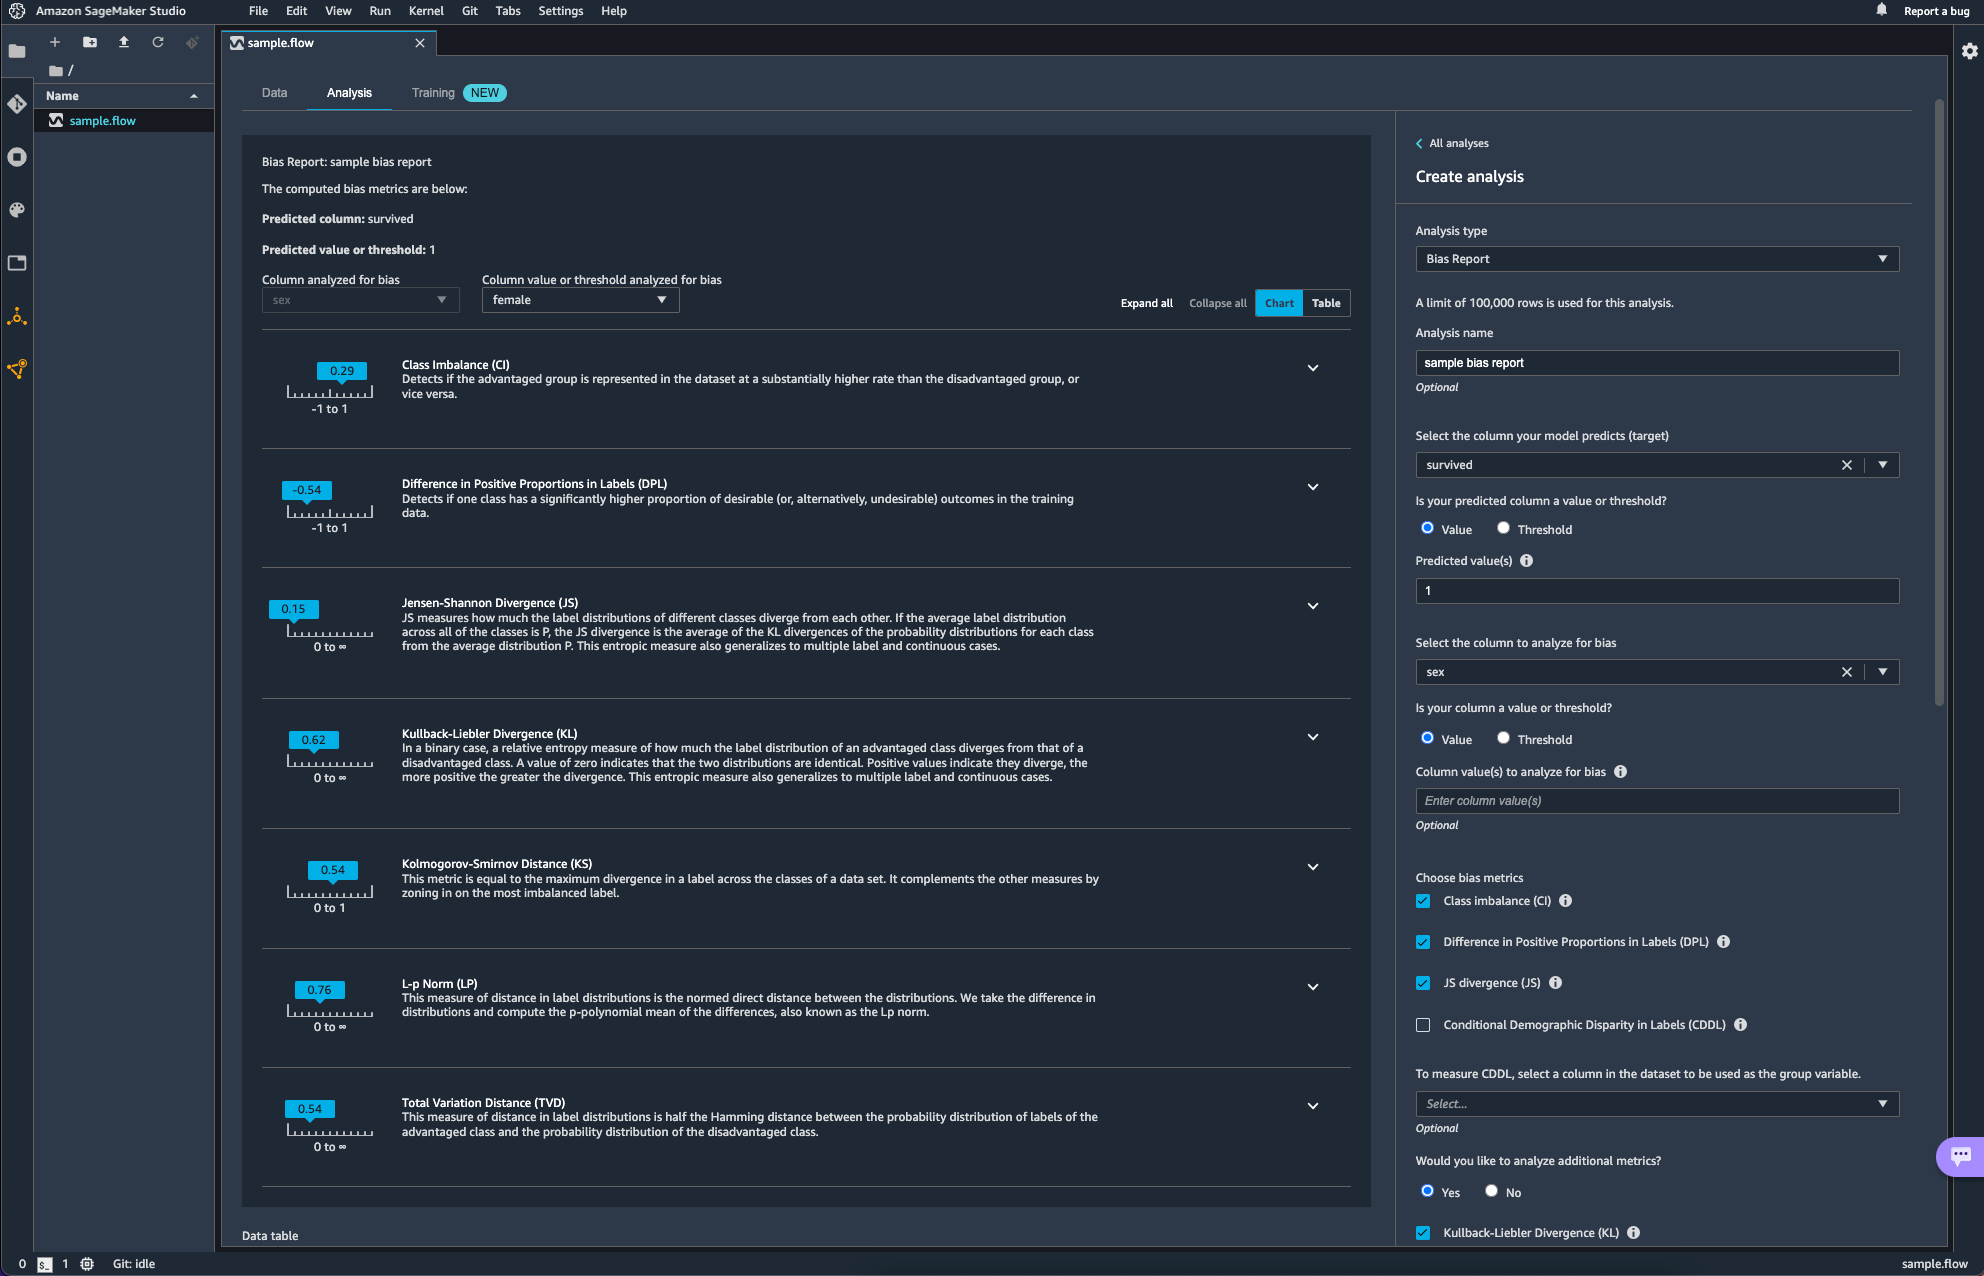
Analysis를 통해 간단한 분석도 가능하다.
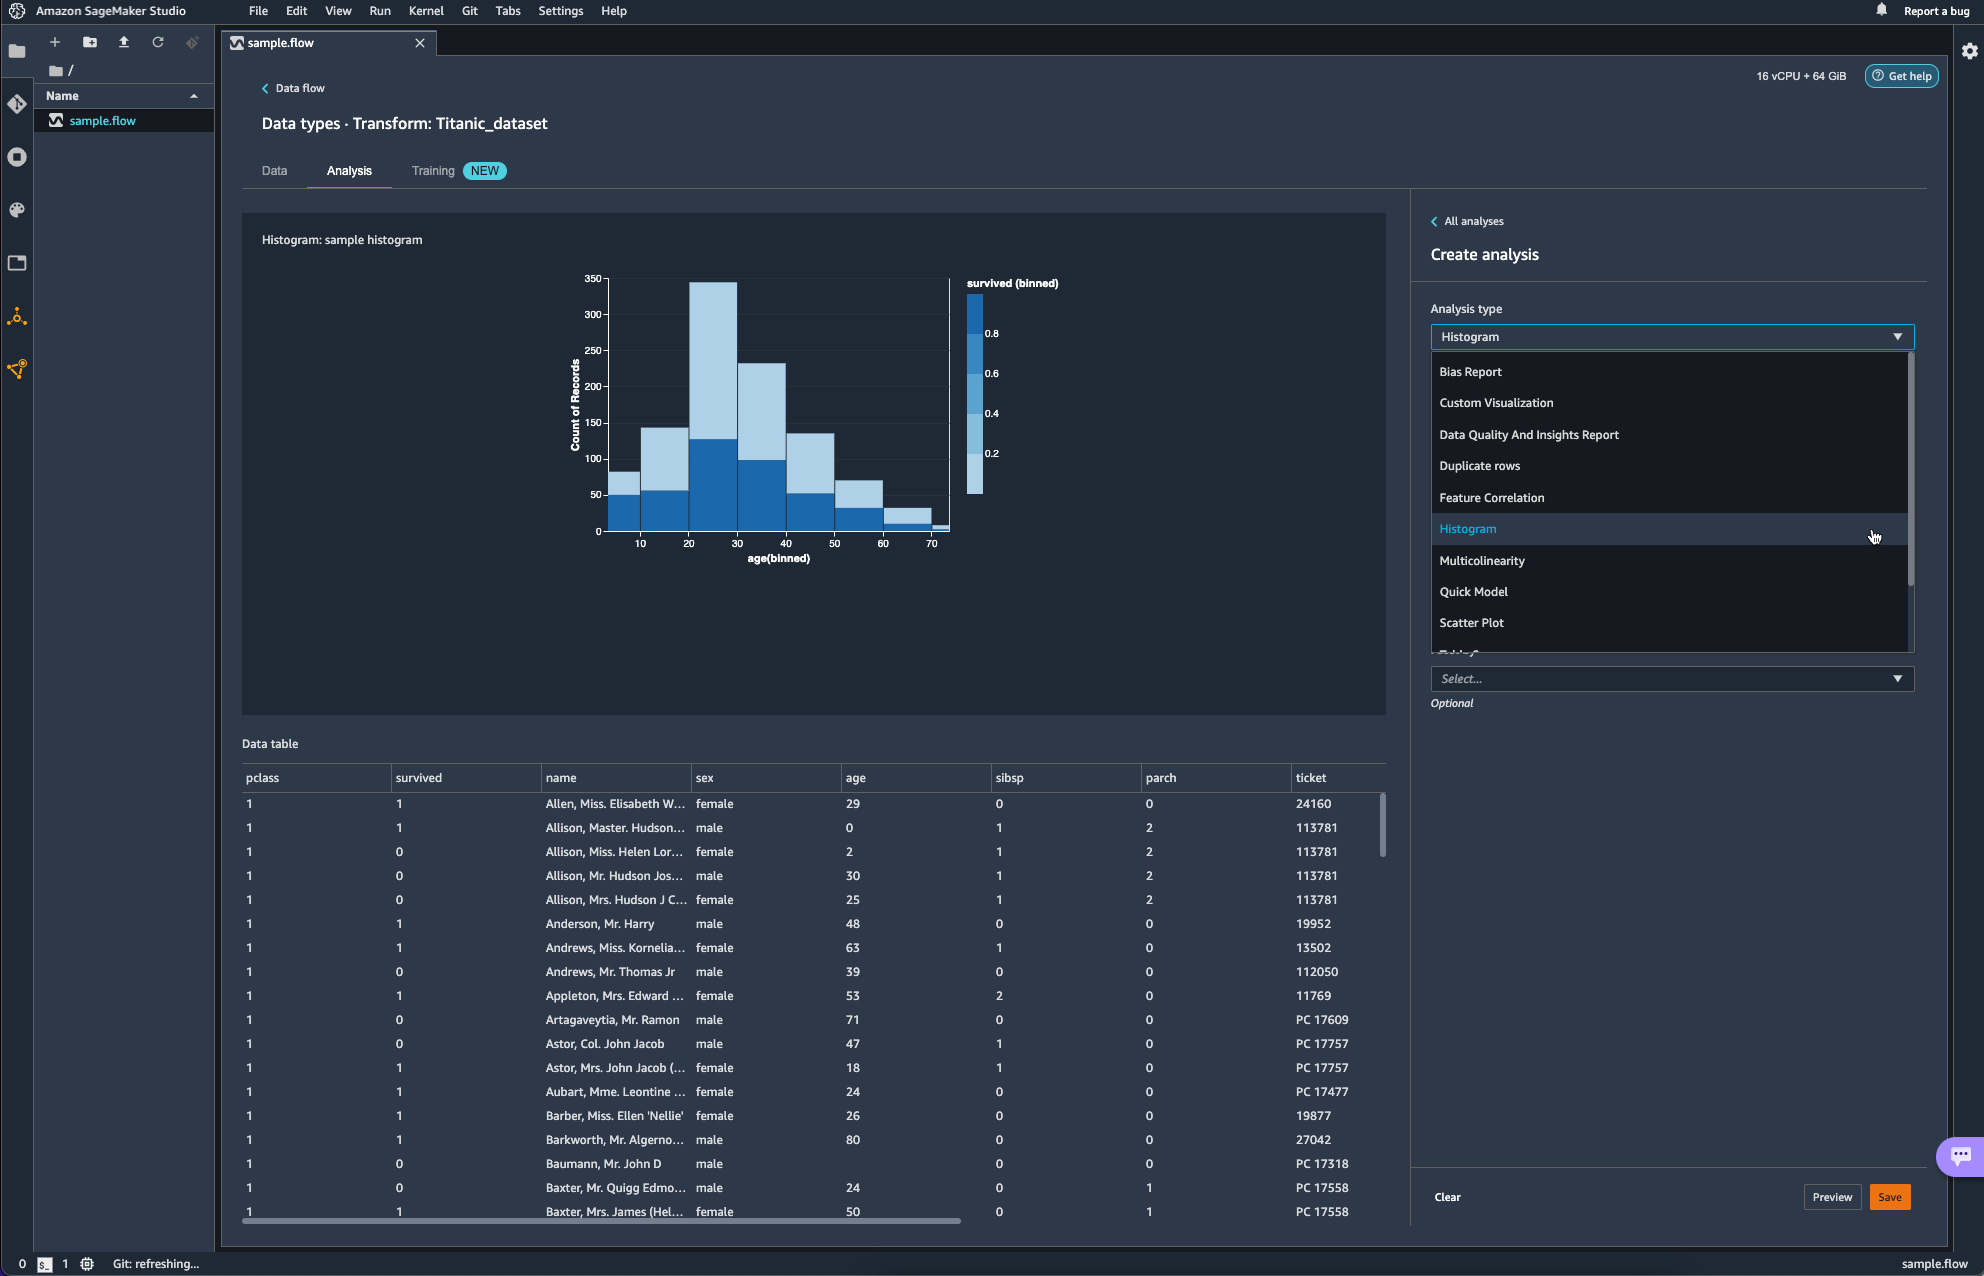
아래 항목은 Data Wrangler를 활용해 bias를 분석하는 작업이다. 타이타닉의 생존 여부(survived)를 target column으로 age에 대한 bias를 분석해보았다.
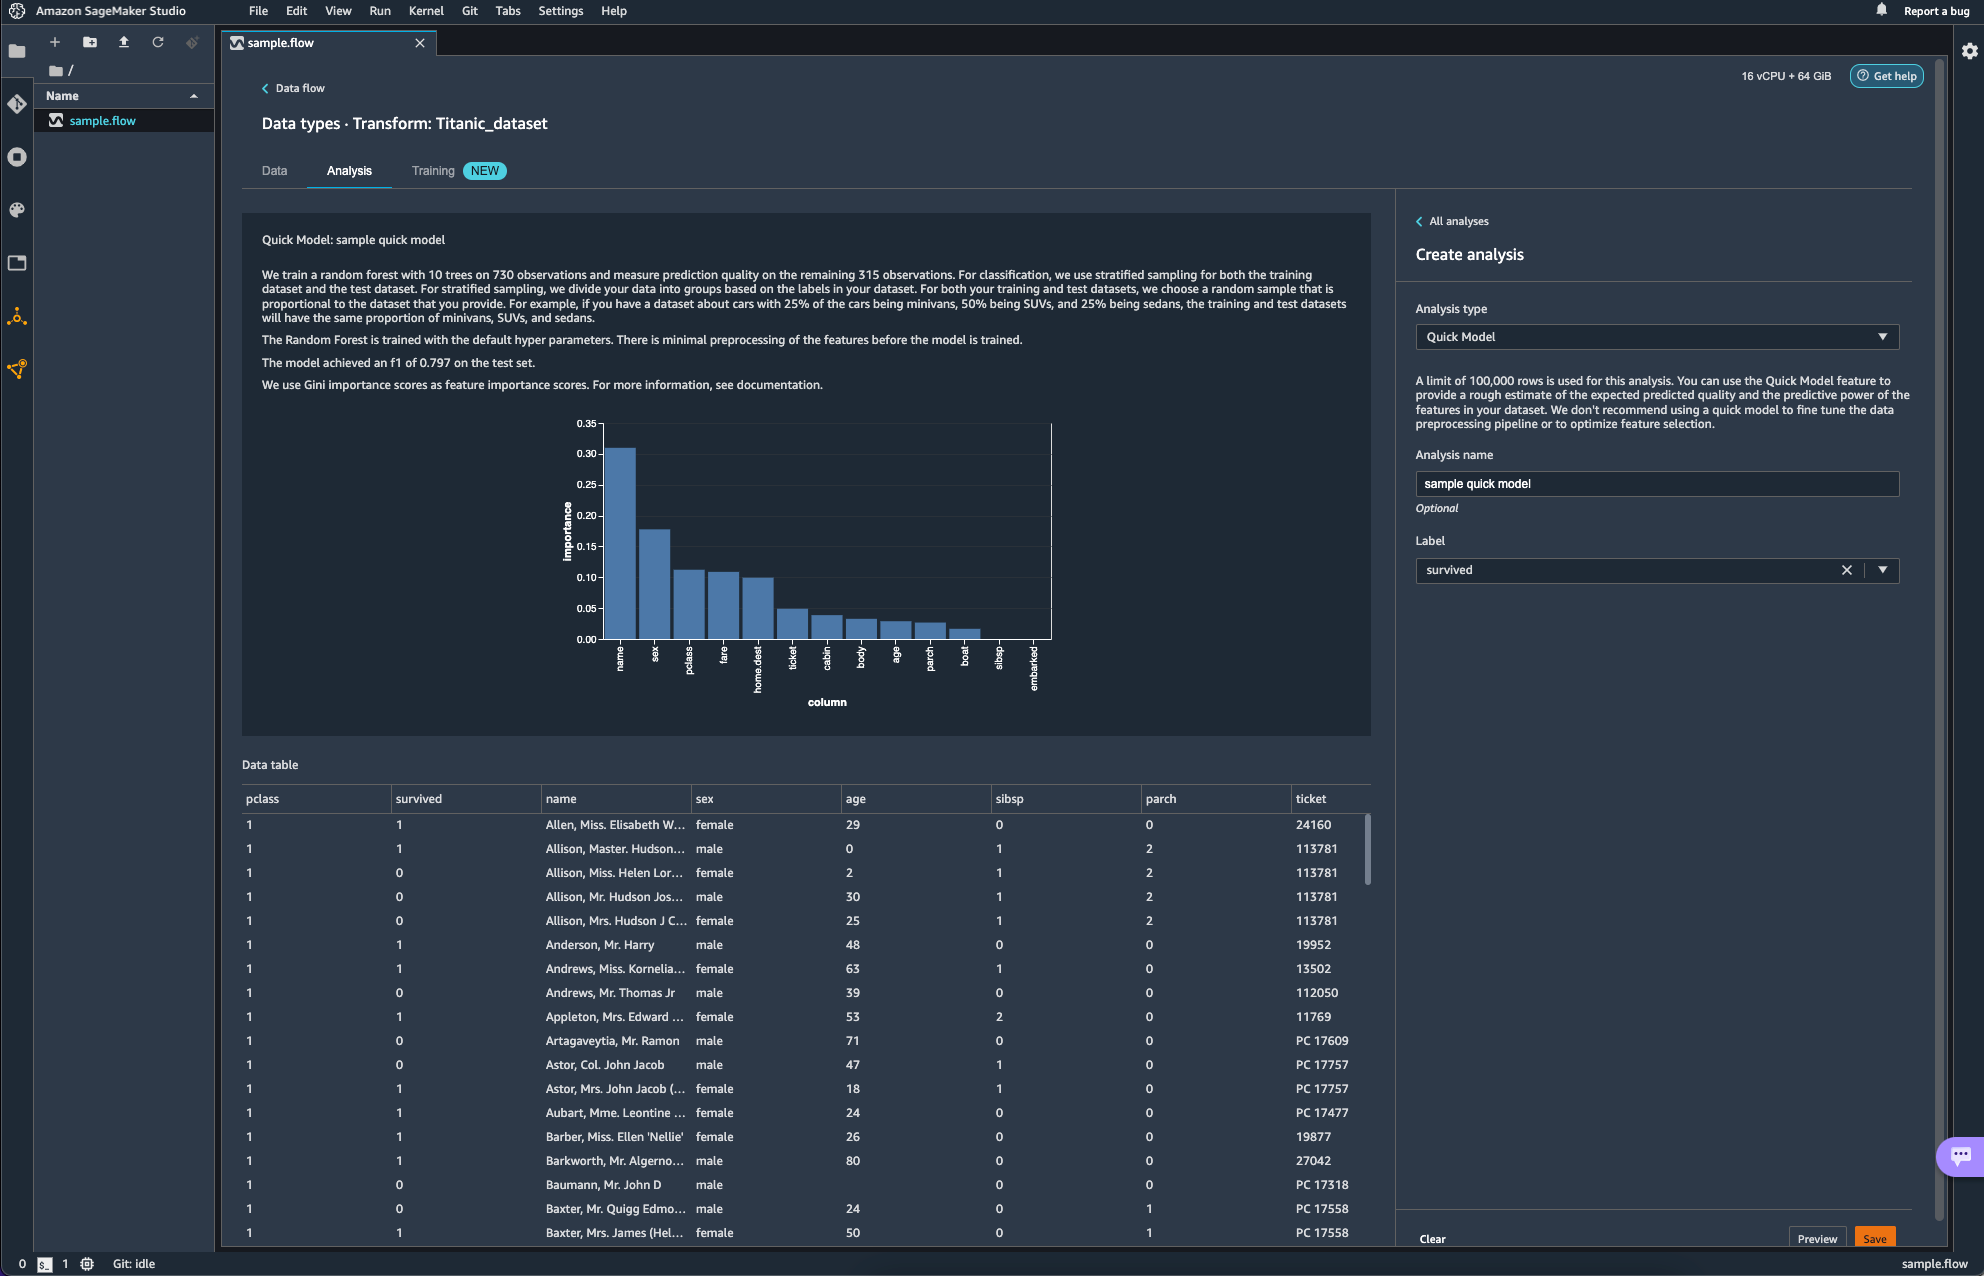
Quick Model이라는 항목도 있다. 빠르게 모델을 학습시켜 feature의 Importance를 매우 rough하게 보여주는 것 같다. 설명에도 쓰여있듯 fine tuning이나 feature selection optimization에도 활용하는 것을 추천하지는 않는다고 하니 대략적인 흐름을 잡는데에만 활용하면 될 듯하다.
위에 New라는 태그가 붙어있는 Training 항목의 경우, 사용하는 방법도 생소하고 AWS의 새로운 서비스를 활용해보려다 비용 폭탄을 맞은 경험이 있어 일단은 넘어가기로 하자. 나중에 조금 더 유명해지면 그때 가서 다시 살펴봐도 늦지 않을 듯 하다.
비용 폭탄이 발생하였던 서비스는 Canvas 라는 서비스이다. 심지어 서울 리전에는 서비스가 아직 제공되지 않아 도쿄 리전에서 실행해봤는데, codeless 한 ML/DL을 제공한다길래 눌렀더니, 아무것도 안해도 Launch App 클릭 한번에 비용이 계속 나가 3일에 대략 20만원 비스무리하게 나갔던 거 같다. 비용은 약간의 과장이 있을 수 있지만 그 비스무리하게 충격적이였다 ... ㅎ
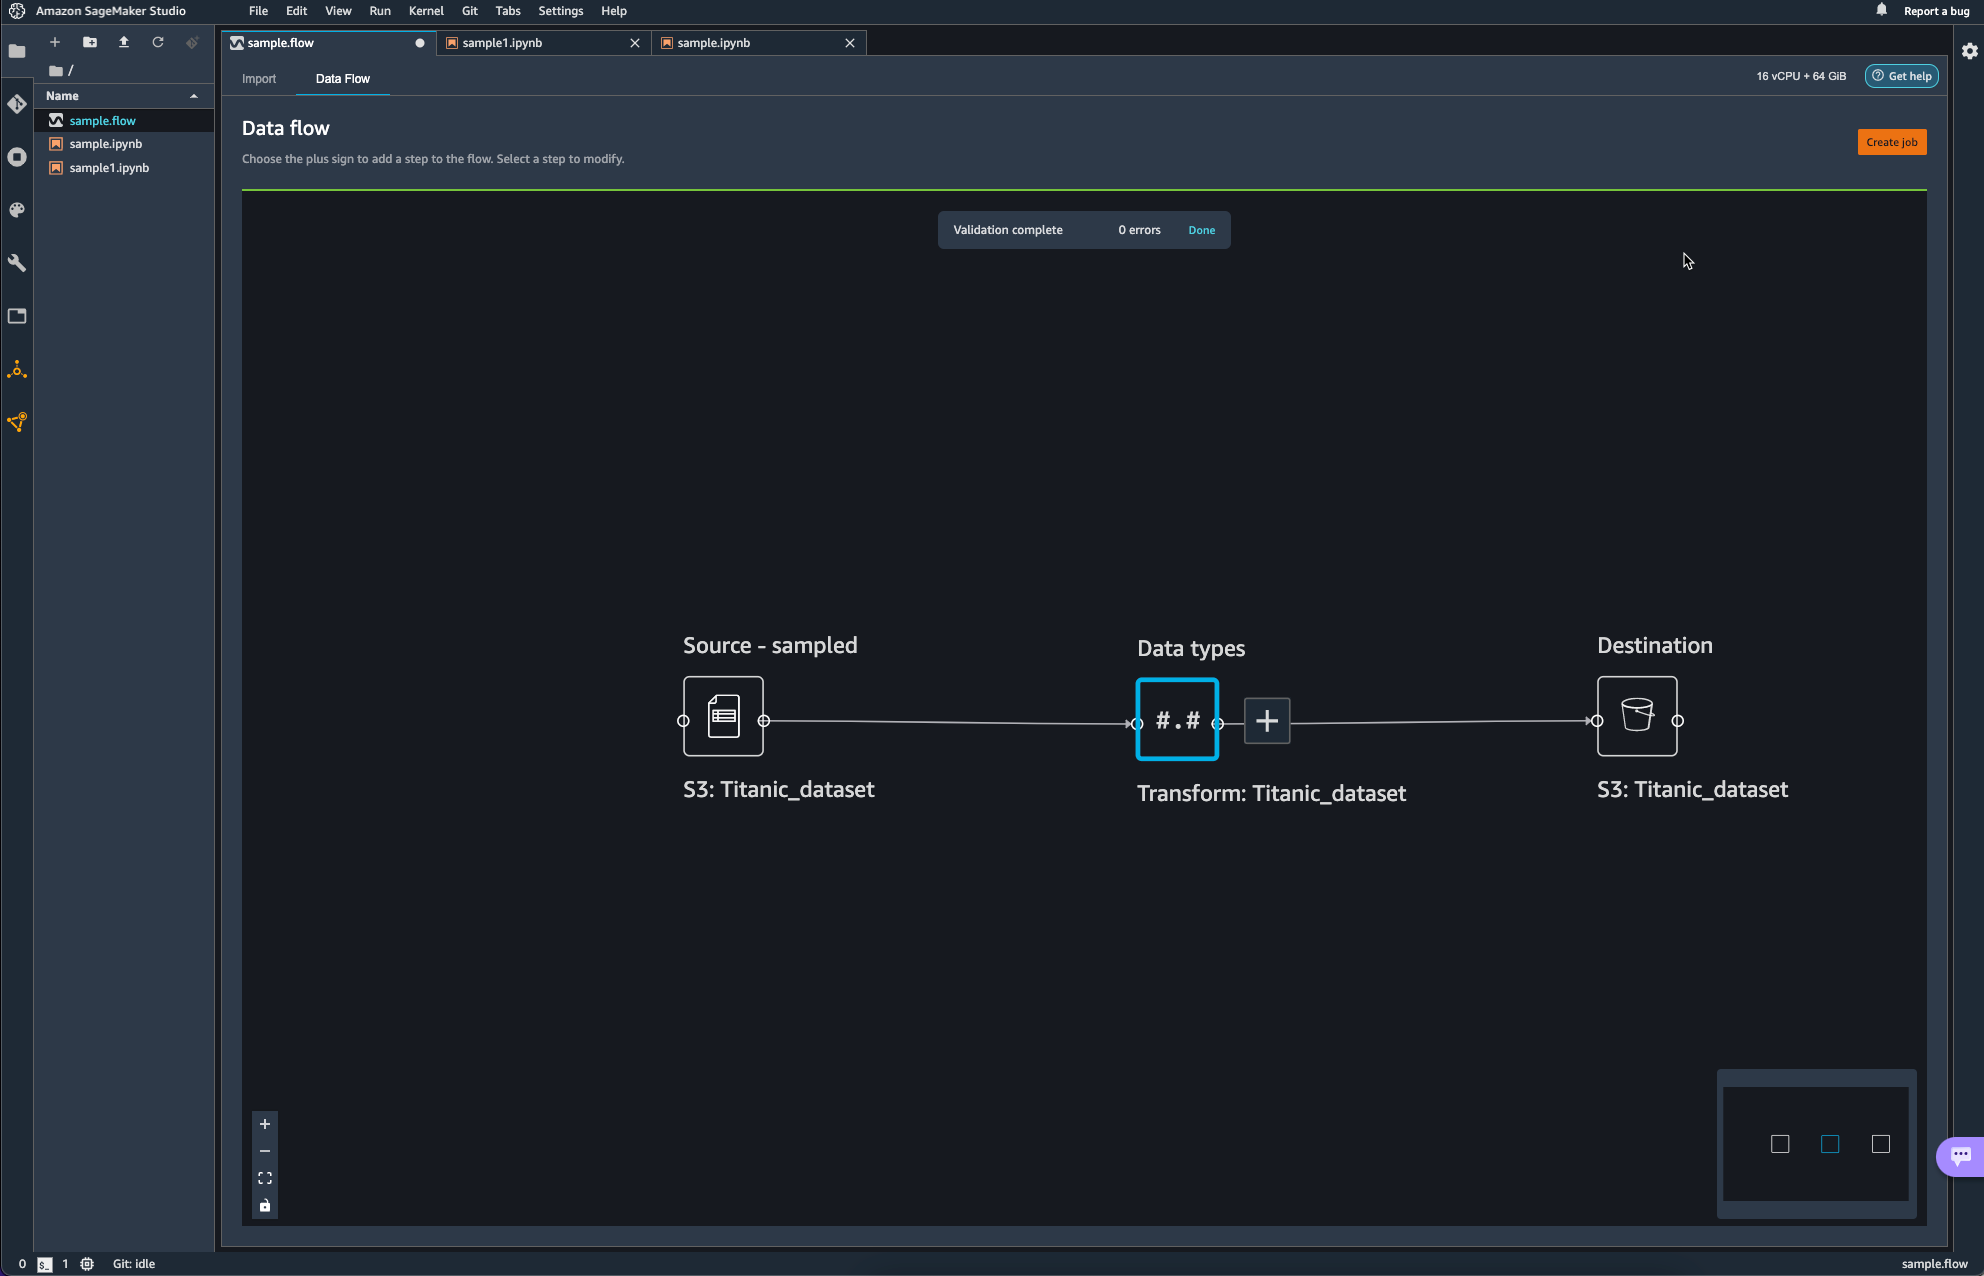
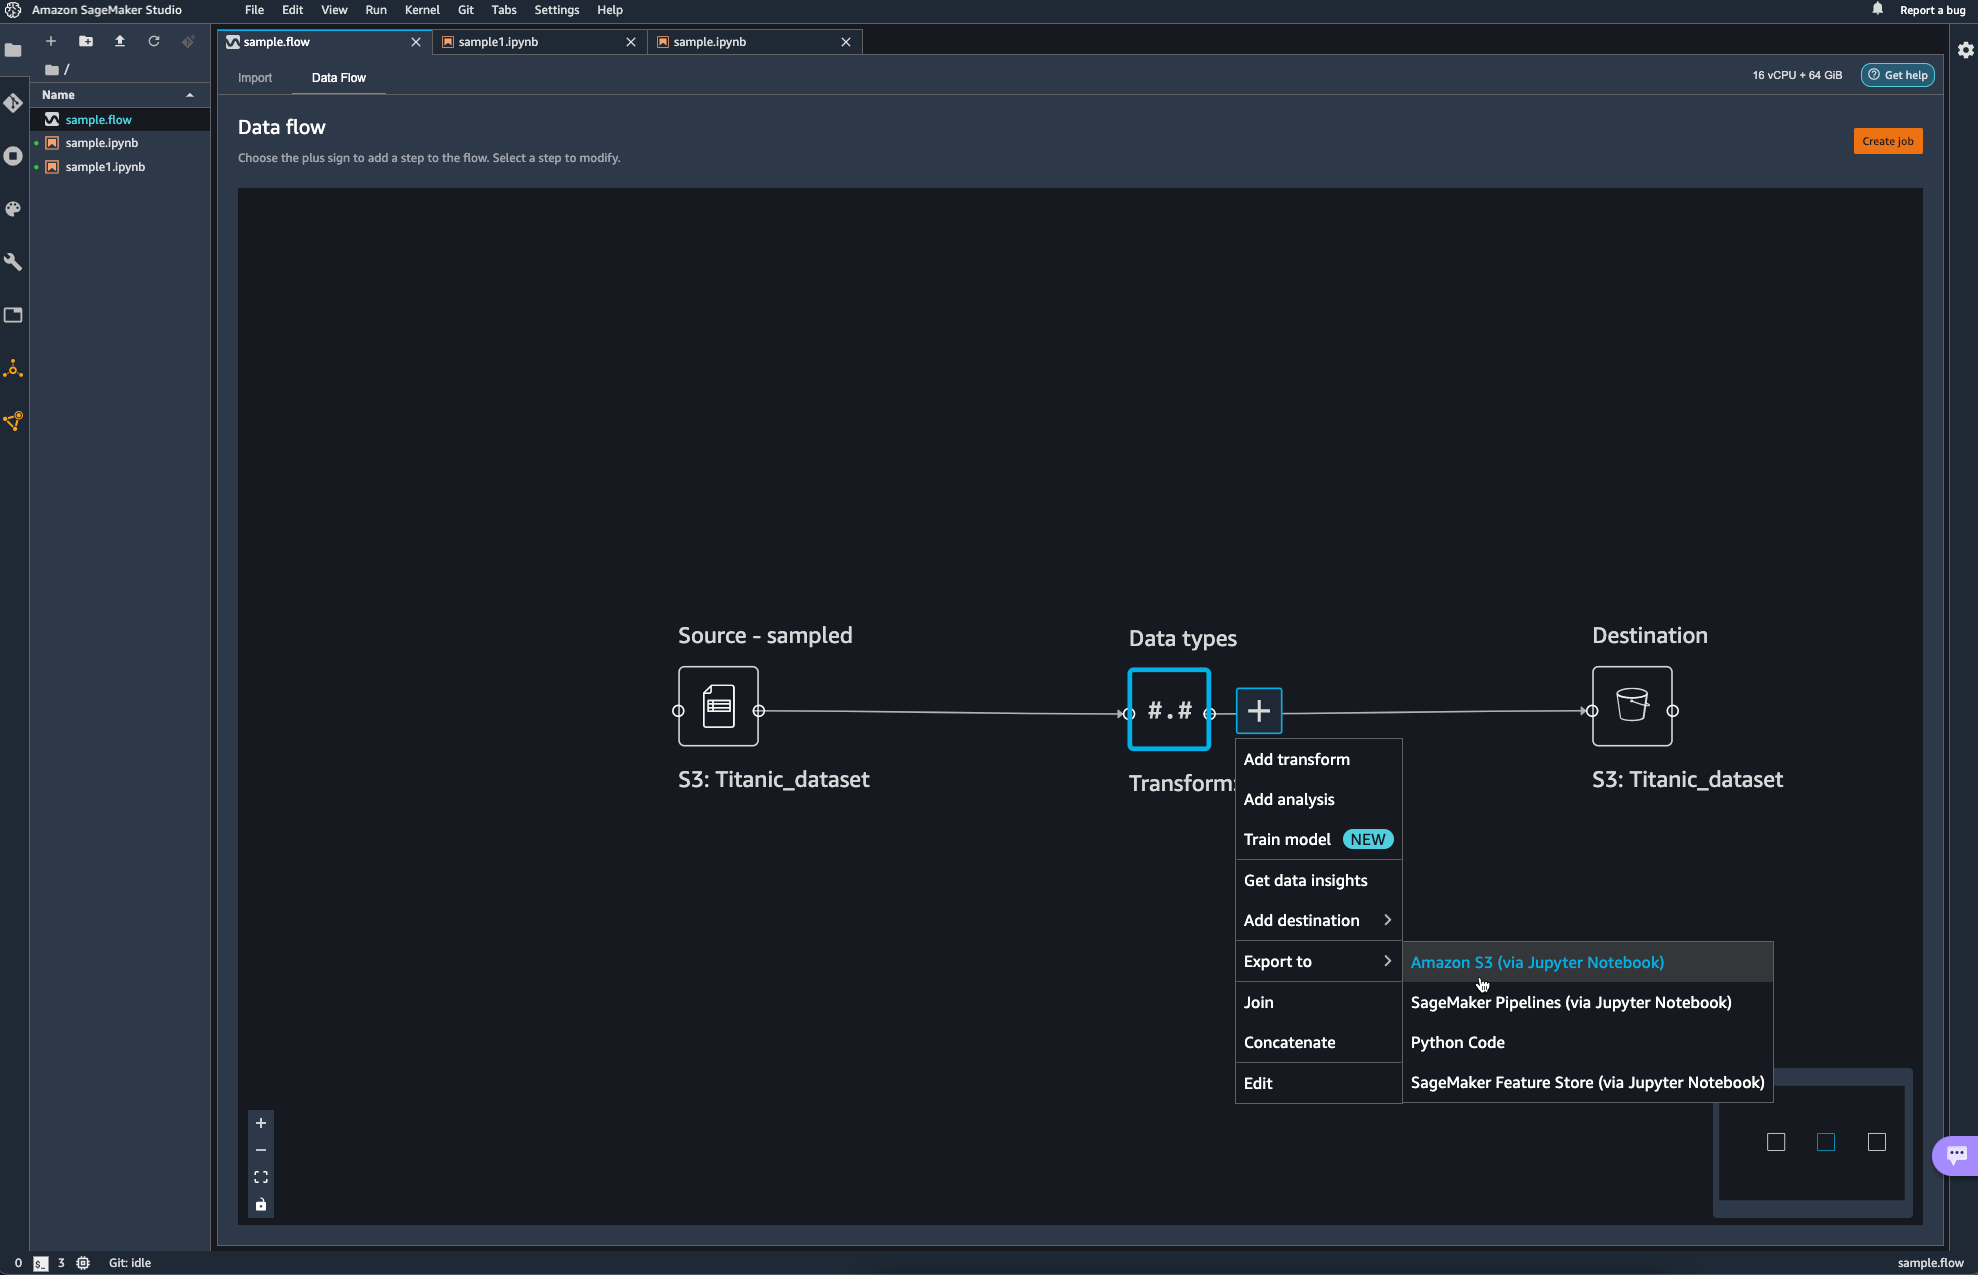
파이프라인의 마무리 작업으로 S3 bucket에 업로드를 하며 data flow 쪽에서의 작업을 마무리하였다.
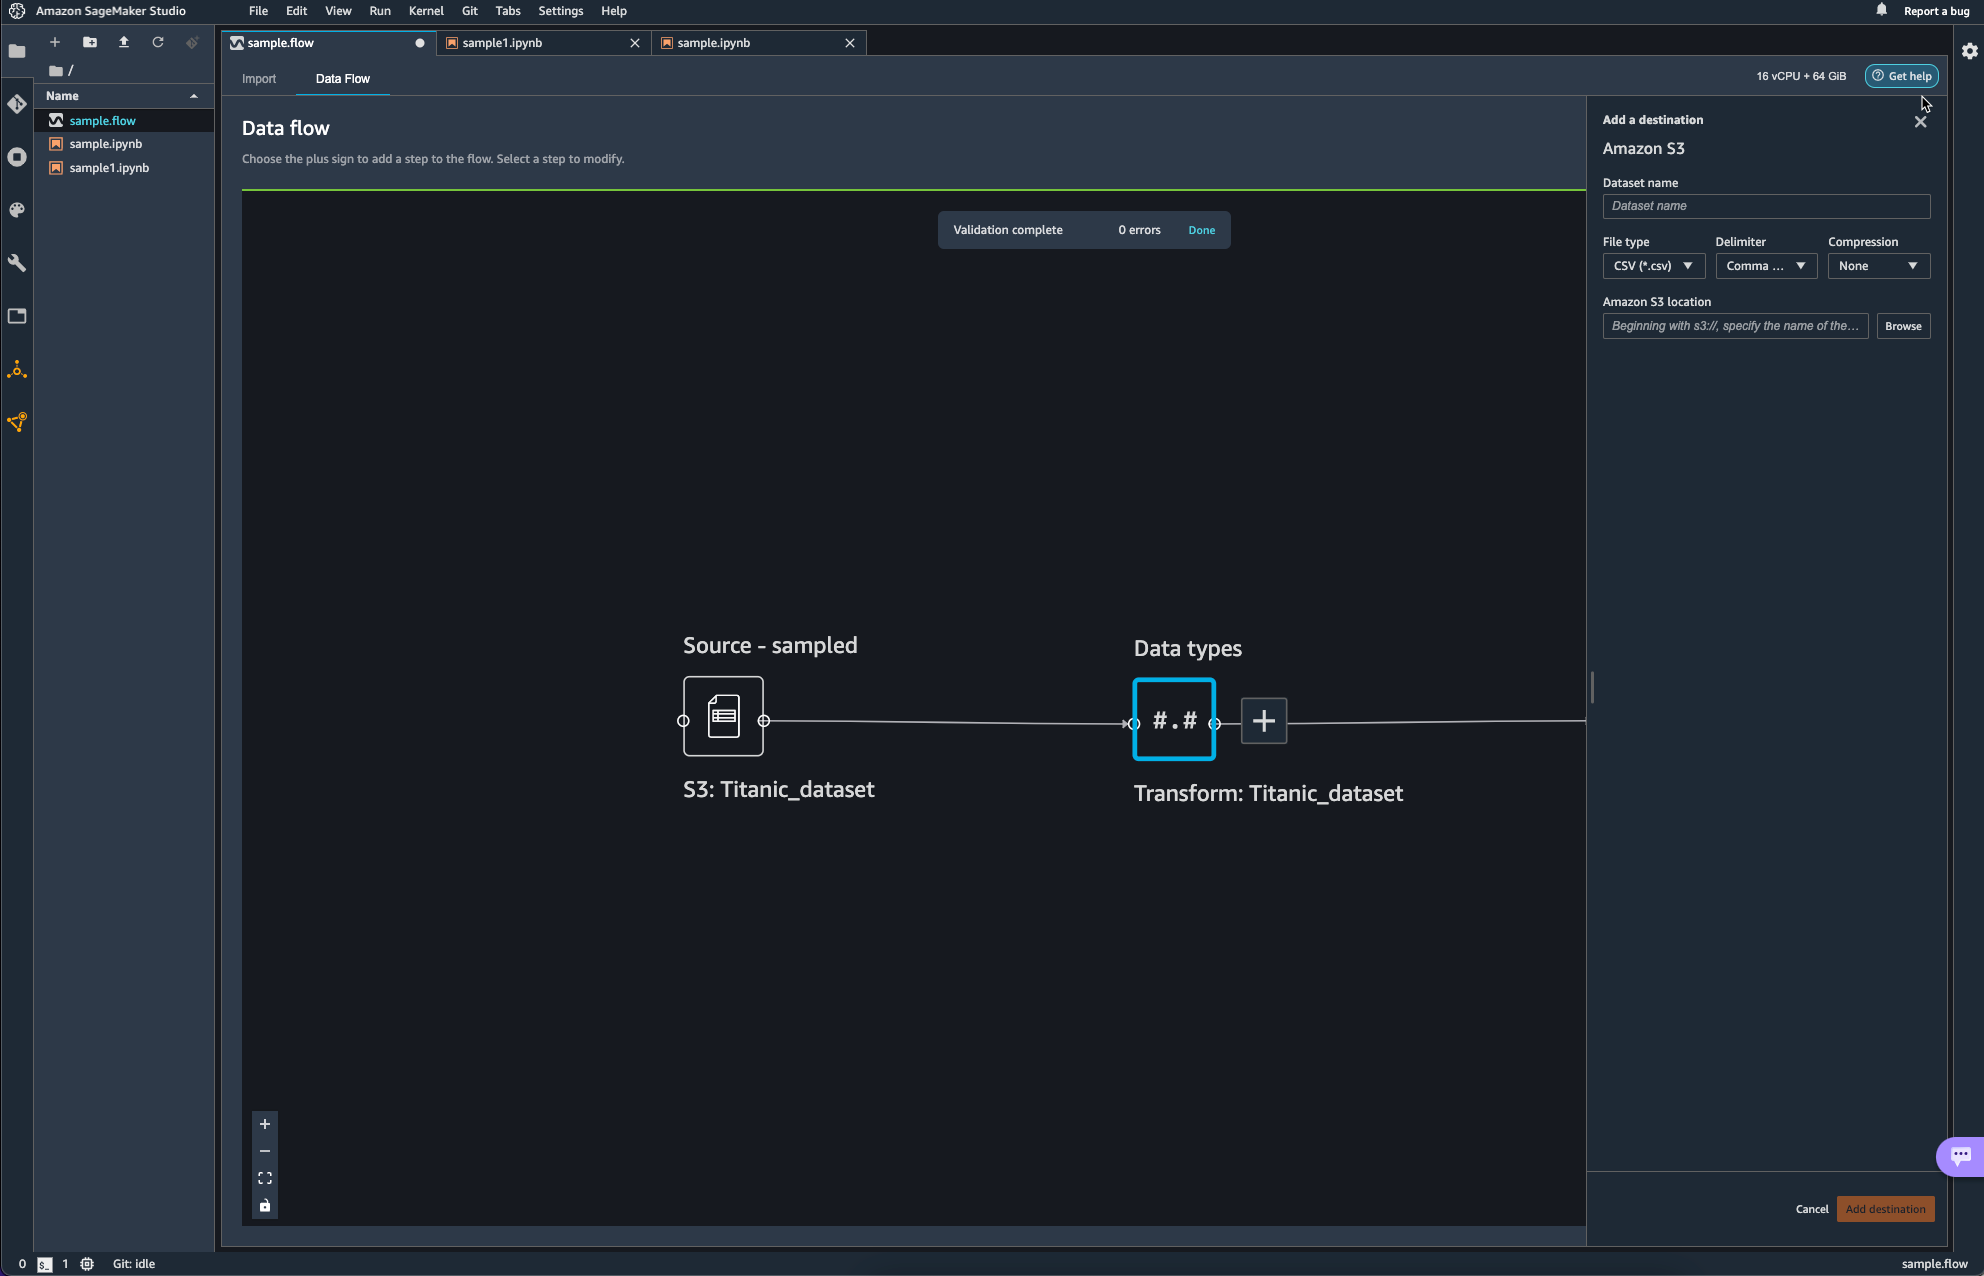
Destination이 추가된 모습이다.
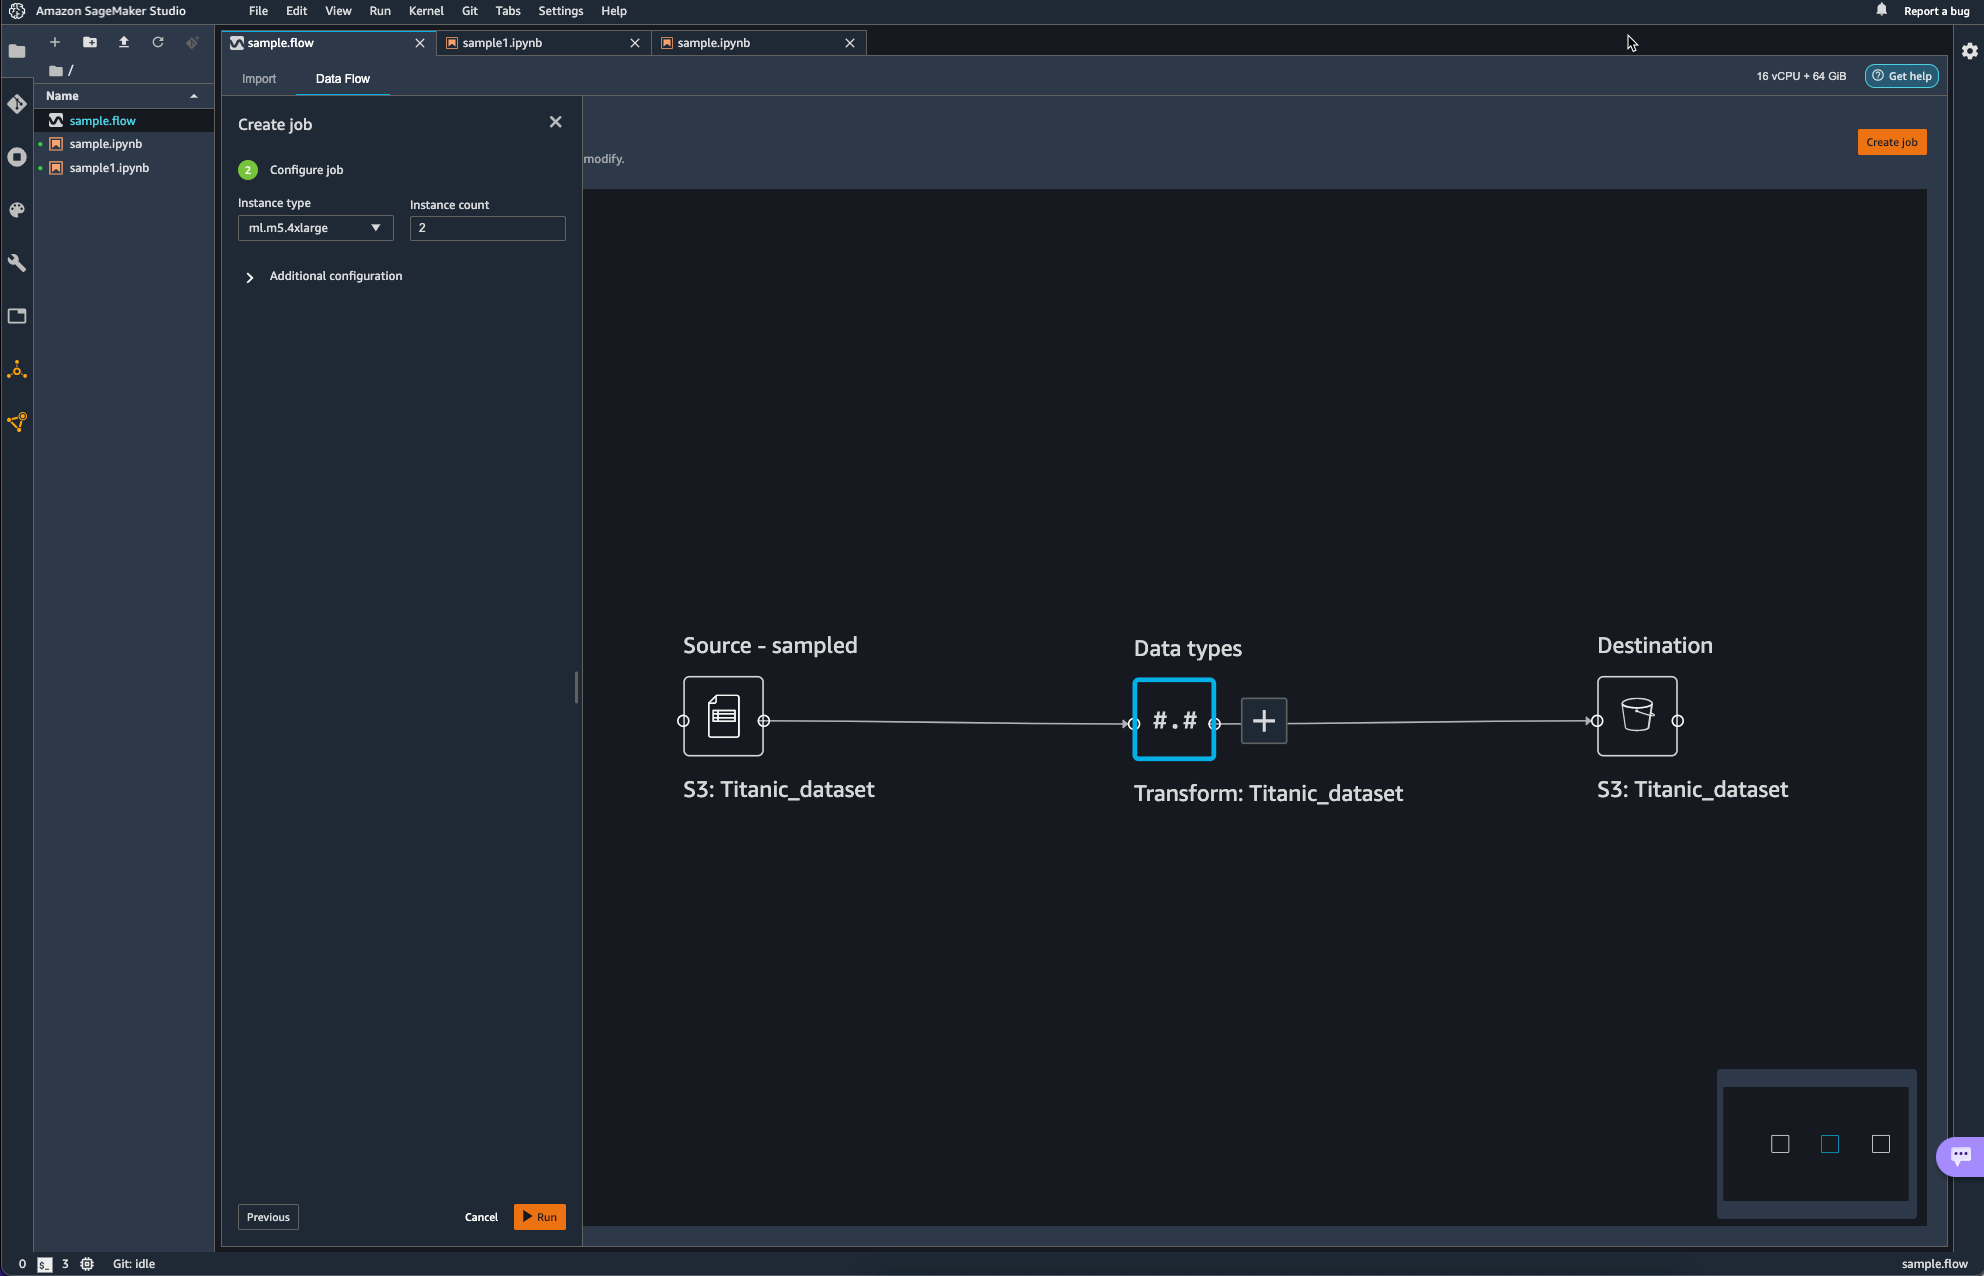
이제 Job을 생성하여 방금까지 생성하였던 Pipeline에 대해서 실제 작업이 일어나도록 해야한다.
오른쪽 상단의 Create Job을 통해 Pipeline Job을 Configure 한다.
이때 인스턴스는 여전히 ml.x5.4xlarge를 사용하는데, default는 2개를 사용하도록 되어 있다.
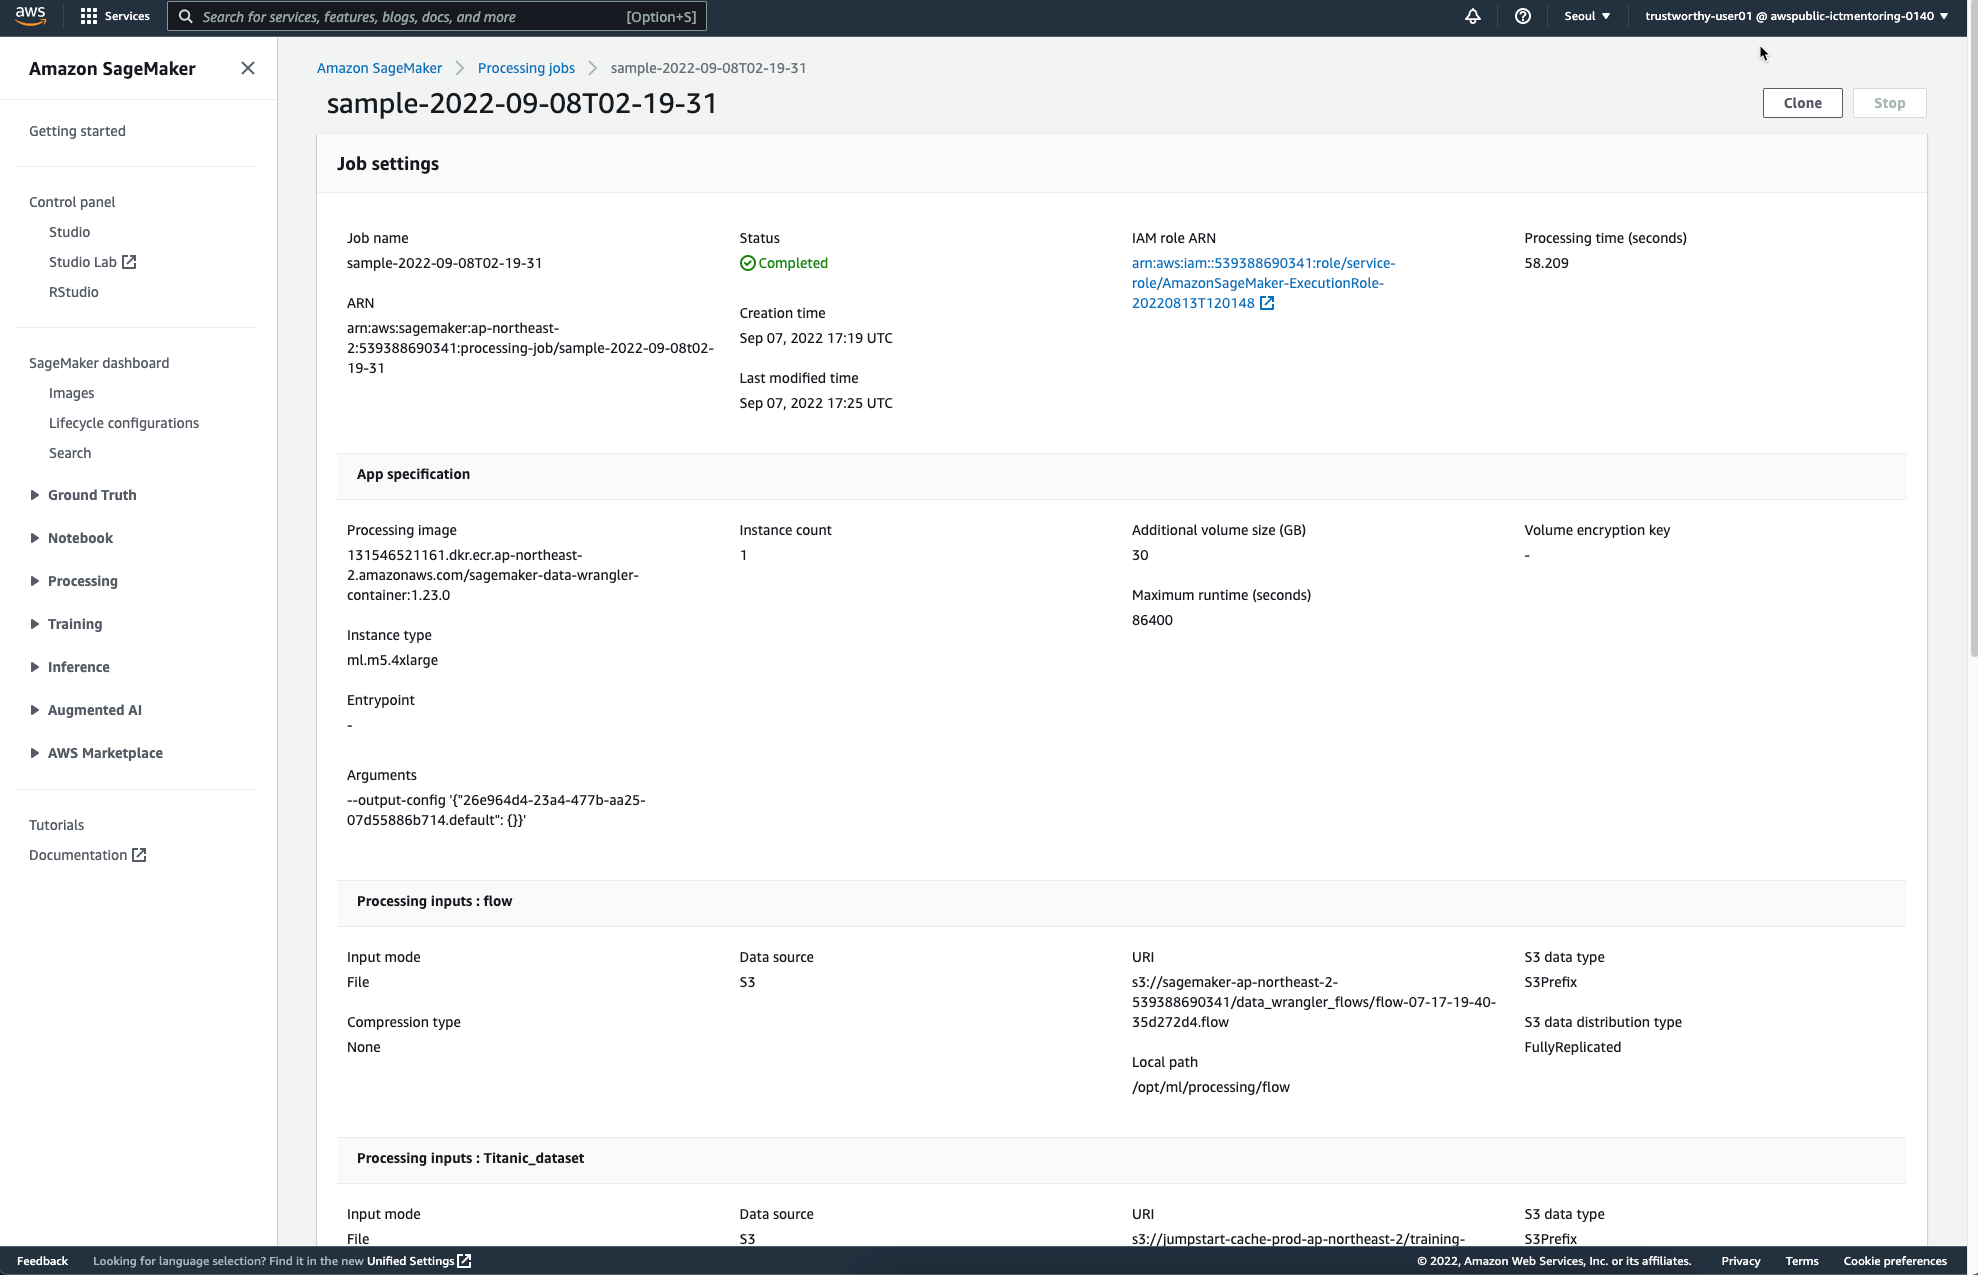
작업이 완료되면 다음과 같은 페이지를 통해 Completed를 안내받을 수 있다.
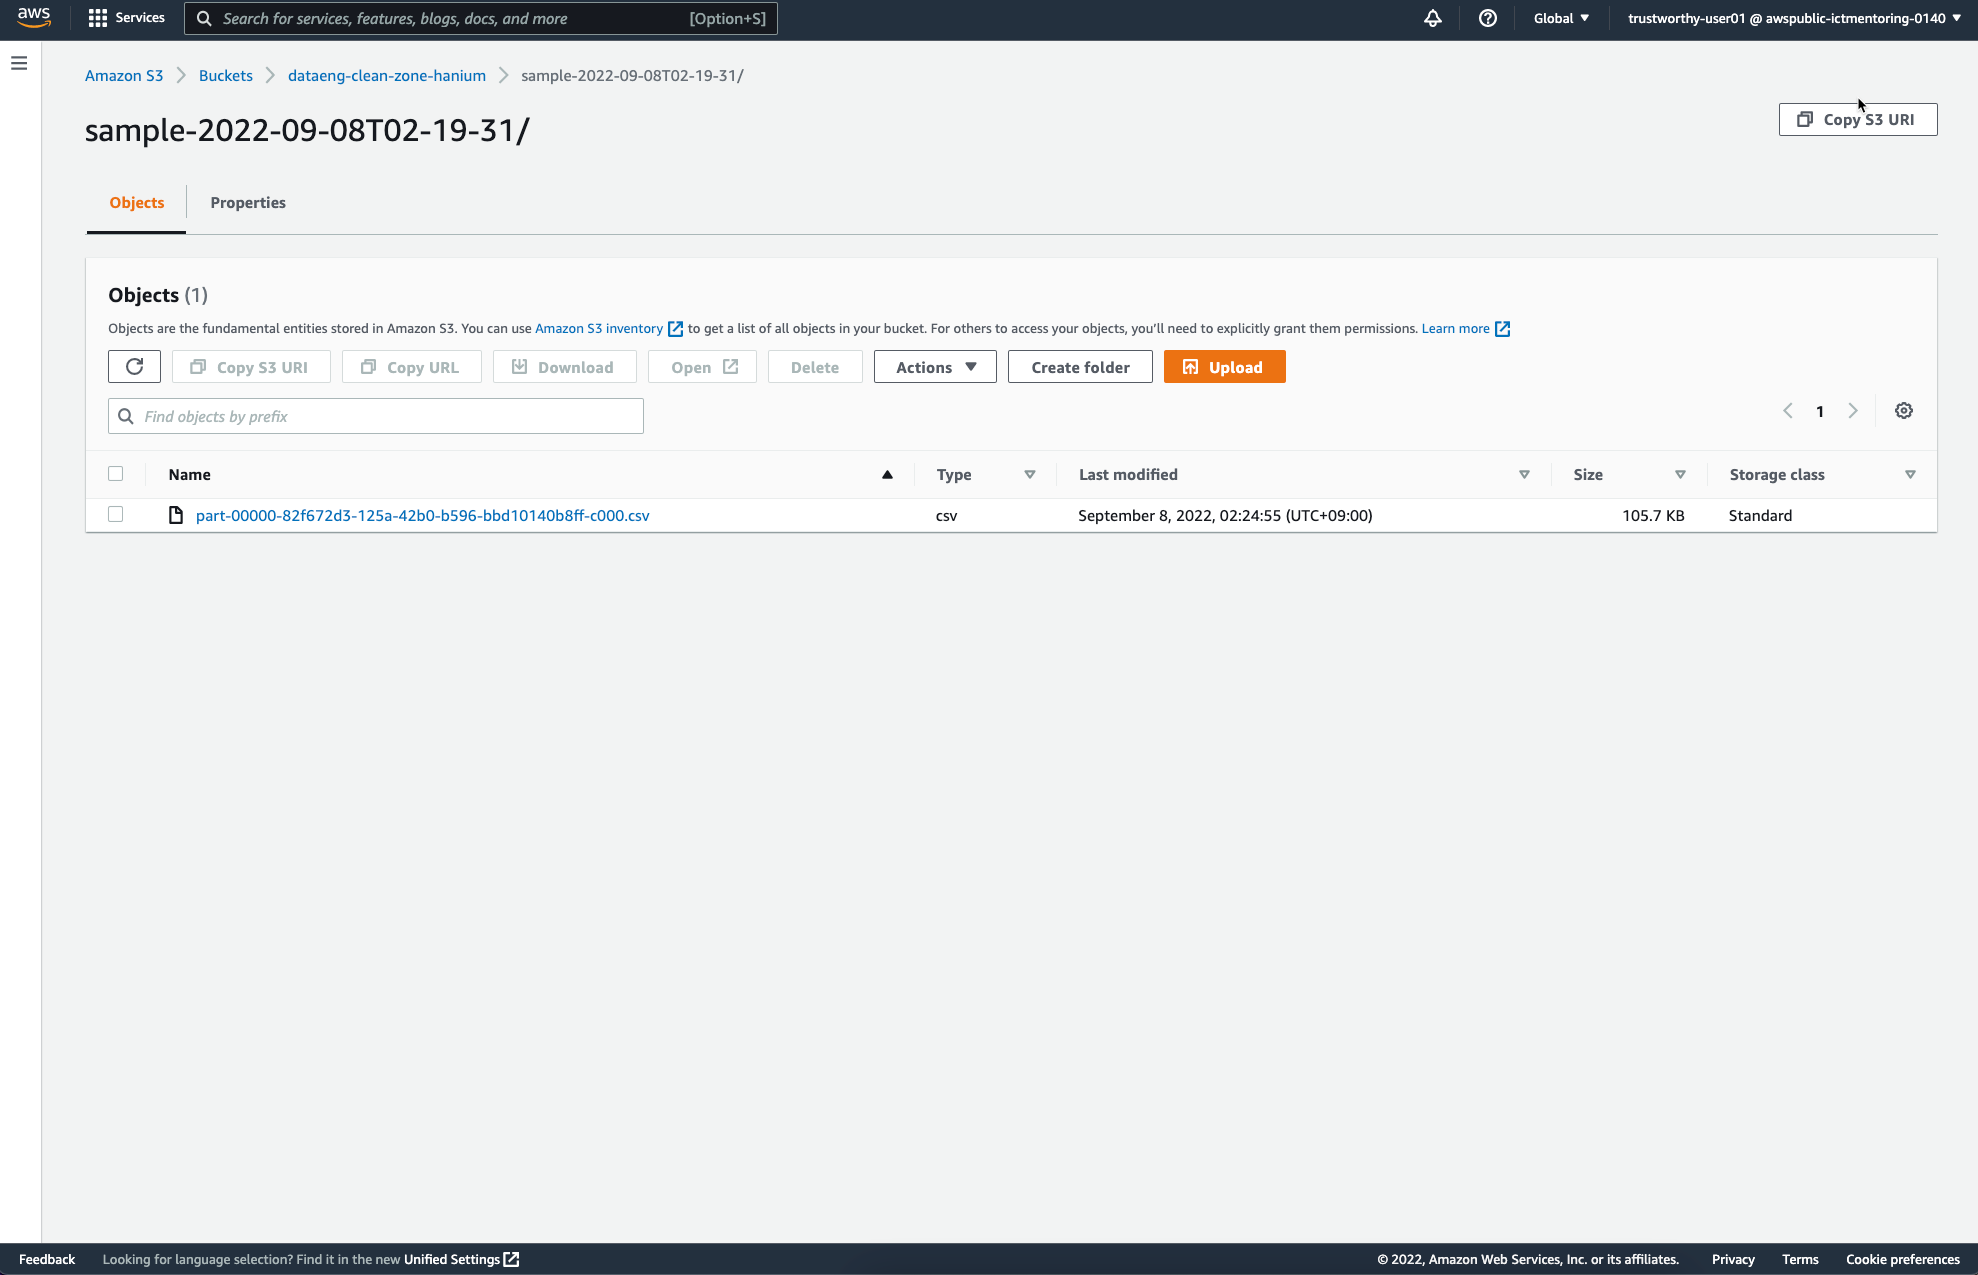
앞서 Job Configure를 통해 설정하였던 S3 Destination에는 다음과 같은 파일이 추가되었다.
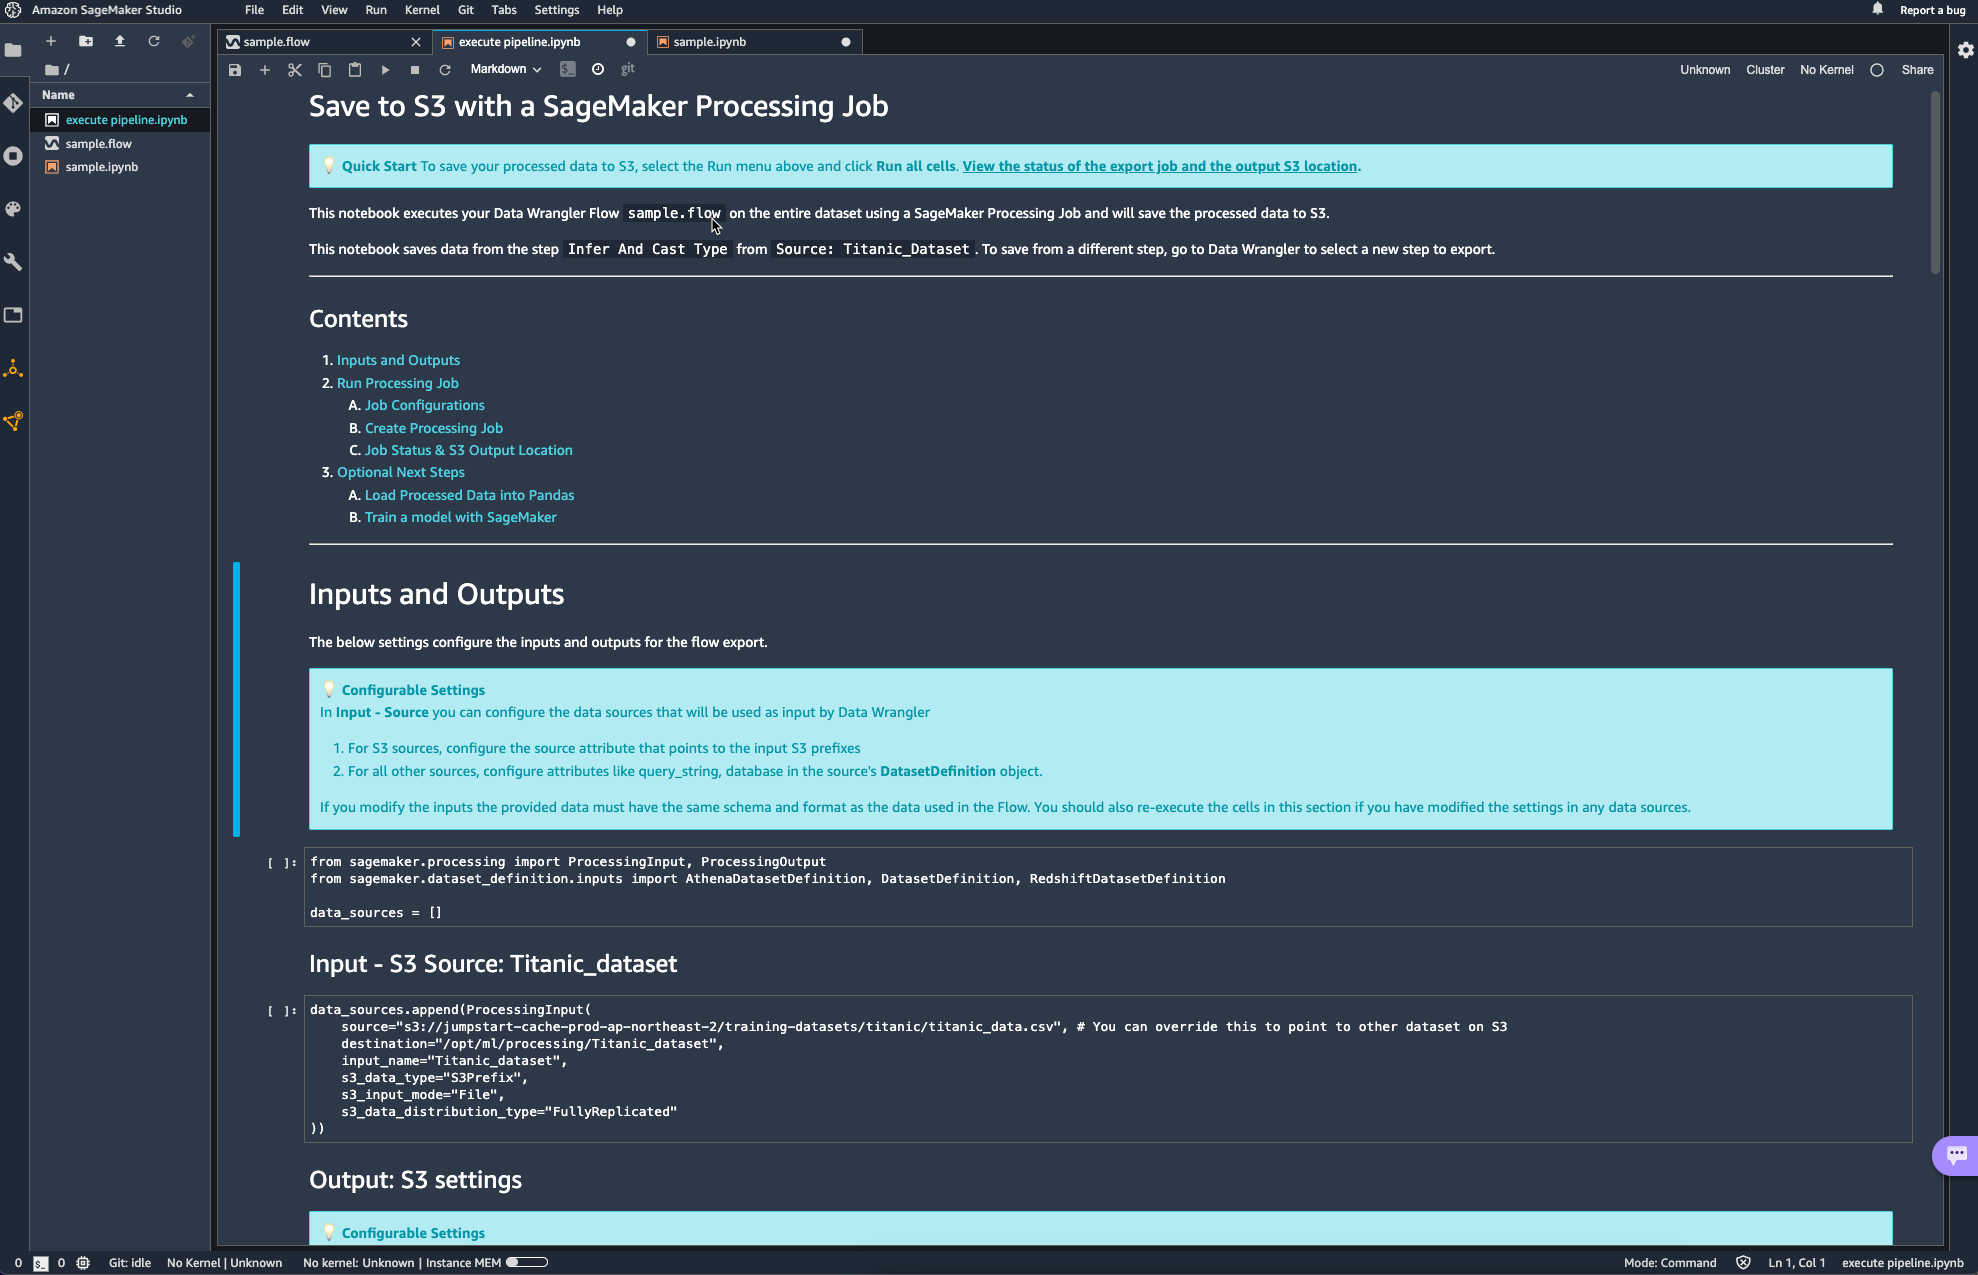
이 외에도 ipynb 노트북을 활용해서도 Data Wrangler flow를 실행할 수 있는데, 이때 자동으로 생성되는 노트북은 거의 대부분의 설정이 이미 되어있어 그냥 실행만 해도 되고, 버킷의 이름과 같은 사소한 정보들만 변경해주면 될 거 같다.
'DevOps > Cloud Service' 카테고리의 다른 글
| [Boto3] S3 bucket 생성 (0) | 2022.09.07 |
|---|---|
| [Boto3] S3 bucket 나열 (0) | 2022.09.07 |
| awscli 1.25.17 requires botocore==1.27.17, but you have botocore 1.27.66 which is incompatible. (0) | 2022.09.06 |
| [네이버 클라우드] 서버 생성 및 접근 (0) | 2022.05.28 |
import logging
import boto3
from botocore.exceptions import ClientError
- logging: 파이썬의 로깅을 위한 패키지이다.
- boto3: AWS의 파이썬 SDK이다. botocore를 사용자 관점에서 사용하기 쉽도록 추상화하였다.
- botocore: boto3의 기반이 되는 패키지이다. low-level interface라고 명시한다.
아래 함수는 bucket을 생성하는 간단한 함수이다.
def create_bucket(bucket_name, region=None):
    """Create an S3 bucket in a specified region

    If a region is not specified, the bucket is created in the s3 defualt region (ap-northeast-2)

    Args:
        bucket_name (_type_): Bucket to create
        region (_type_, optional): String region to create bucket in, e.g 'ap-northeast-2'. Defaults to None.
    """

    # Create bucket
    try:
        if region is None:
            s3_client = boto3.client('s3')
            s3_client.create_bucket(Bucket=bucket_name)
    except ClientError as err:
        logging.error(err)
        return False
    return True
boto3.client('s3').create_bucket() 에는 두가지 argument가 가장 많이 활용된다.
- Bucket: 생성하고자 하는 버킷의 이름
- CreateBucketConfiguration: 버킷을 생성하고자 하는 리전 정보
Bucket의 경우, string으로 생성하고자 하는 버킷의 이름을 그대로 전달하면 된다.
CreateBucketConfiguration의 경우, 딕셔너리로 wrapping한 리전의 정보가 들어가야 한다.
이게 무슨 말이냐면, 다음과 같이 location이라는 딕셔너리를 먼저 구성하고 LocationConstraint라는 키에 region 값을 넣어주게 된다.
location = {'LocationConstraint': region}
s3_client.create_bucket(Bucket=name, CreateBucketConfiguration=location)
이때, argument 값은 항상 keyword argument로 제공되어야 한다.
location = {'LocationConstraint': region}
s3_client.create_bucket(Bucket=name, location)

----------------------------------------------
OUTPUT:
s3_client.create_bucket(Bucket=name, location)                                                ^
SyntaxError: positional argument follows keyword argument
'DevOps > Cloud Service' 카테고리의 다른 글
| [SageMaker studio] Data Wrangler flow (0) | 2022.09.08 |
|---|---|
| [Boto3] S3 bucket 나열 (0) | 2022.09.07 |
| awscli 1.25.17 requires botocore==1.27.17, but you have botocore 1.27.66 which is incompatible. (0) | 2022.09.06 |
| [네이버 클라우드] 서버 생성 및 접근 (0) | 2022.05.28 |
헤더
import boto3리소스 가져오기
## 'ap-northeast'는 'seoul region' 을 의미한다.
s3_resource = boto3.client('s3', 'ap-northeast-2')
response = s3_resource.list_buckets()
계정 내에 존재하는 버킷 리스트 출력
print("계정 내의 S3 버킷 리스트")
for bucket in response['Buckets']:
    print(f'{bucket["Name"]}')
Output:
계정 내의 S3 버킷 리스트
aws-glue-assets-539388690341-ap-northeast-2
dataeng-clean-zone-hanium
dataeng-landing-zone-hanium
hanium-trustworthyai-sources
itv-flights-2016
mass-shooting-athena
sagemaker-ap-northeast-1-539388690341
sagemaker-studio-539388690341-481jja1sjok
sagemaker-studio-539388690341-u2k7k0dbae
boto3.client('s3').list_buckets()를 출력해보면 다음과 같은 필드를 얻을 수 있다.
{
    "ResponseMetadata": {
        "RequestId": "A3P5SA28ZNXRXHTE",
        "HostId": "J/+Z3CtQVjVqspi7x+KYUdscAA0uIkfFBfdHTV+Rv9gJPmzac2CZeVQVIIh8k/Pgm+bSfCpzWz4=",
        "HTTPStatusCode": 200,
        "HTTPHeaders": {
            "x-amz-id-2": "J/+Z3CtQVjVqspi7x+KYUdscAA0uIkfFBfdHTV+Rv9gJPmzac2CZeVQVIIh8k/Pgm+bSfCpzWz4=",
            "x-amz-request-id": "A3P5SA28ZNXRXHTE",
            "date": "Wed, 07 Sep 2022 12:12:00 GMT",
            "content-type": "application/xml",
            "transfer-encoding": "chunked",
            "server": "AmazonS3"
        },
        "RetryAttempts": 0
    },
    "Buckets": [
        {
            "Name": "aws-glue-assets-539388690341-ap-northeast-2",
            "CreationDate": "2022-07-07 03:18:43+00:00"
        },
        {
            "Name": "dataeng-clean-zone",
            "CreationDate": "2022-08-25 18:47:15+00:00"
        },
        {
...
    "Owner": {
        "ID": "f6ab8c78aba1c3a39c22ab469cvee113f2fc1c029fe123429230b0df4077d5e2d"
    }
}
boto3.client('s3').list_buckets()['Buckets'] 값을 살펴보면, 다시 Name과 CreationDate로 나눠지는 모습을 확인할 수 있다.
이때, CreationDate의 시간 형식(tzinfo)는 tzutc 형식을 따른다.
2019-10-25 15:33:27.388853+0000 와 같은 형식을 tzutc time format이라고 한다.
'DevOps > Cloud Service' 카테고리의 다른 글
| [SageMaker studio] Data Wrangler flow (0) | 2022.09.08 |
|---|---|
| [Boto3] S3 bucket 생성 (0) | 2022.09.07 |
| awscli 1.25.17 requires botocore==1.27.17, but you have botocore 1.27.66 which is incompatible. (0) | 2022.09.06 |
| [네이버 클라우드] 서버 생성 및 접근 (0) | 2022.05.28 |
awscli 1.25.17 requires botocore==1.27.17, but you have botocore 1.27.66 which is incompatible.
에러 상황
$pip install botocore==1.27.17
ERROR: pip's dependency resolver does not currently take into account all the packages that are installed. This behaviour is the source of the following dependency conflicts.
boto3 1.24.66 requires botocore<1.28.0,>=1.27.66, but you have botocore 1.27.17 which is incompatible.

$pip install botocore==1.27.66
ERROR: pip's dependency resolver does not currently take into account all the packages that are installed. This behaviour is the source of the following dependency conflicts.
awscli 1.25.17 requires botocore==1.27.17, but you have botocore 1.27.66 which is incompatible.
해결방법: 결국 재설치
$ pip3 install awscli --upgrade --user

$ pip3 uninstall botocore
$ pip3 uninstall botocore

$ pip3 install botocore
$ pip3 install boto3'DevOps > Cloud Service' 카테고리의 다른 글
| [SageMaker studio] Data Wrangler flow (0) | 2022.09.08 |
|---|---|
| [Boto3] S3 bucket 생성 (0) | 2022.09.07 |
| [Boto3] S3 bucket 나열 (0) | 2022.09.07 |
| [네이버 클라우드] 서버 생성 및 접근 (0) | 2022.05.28 |
ACG의 생성
Network Interface 생성

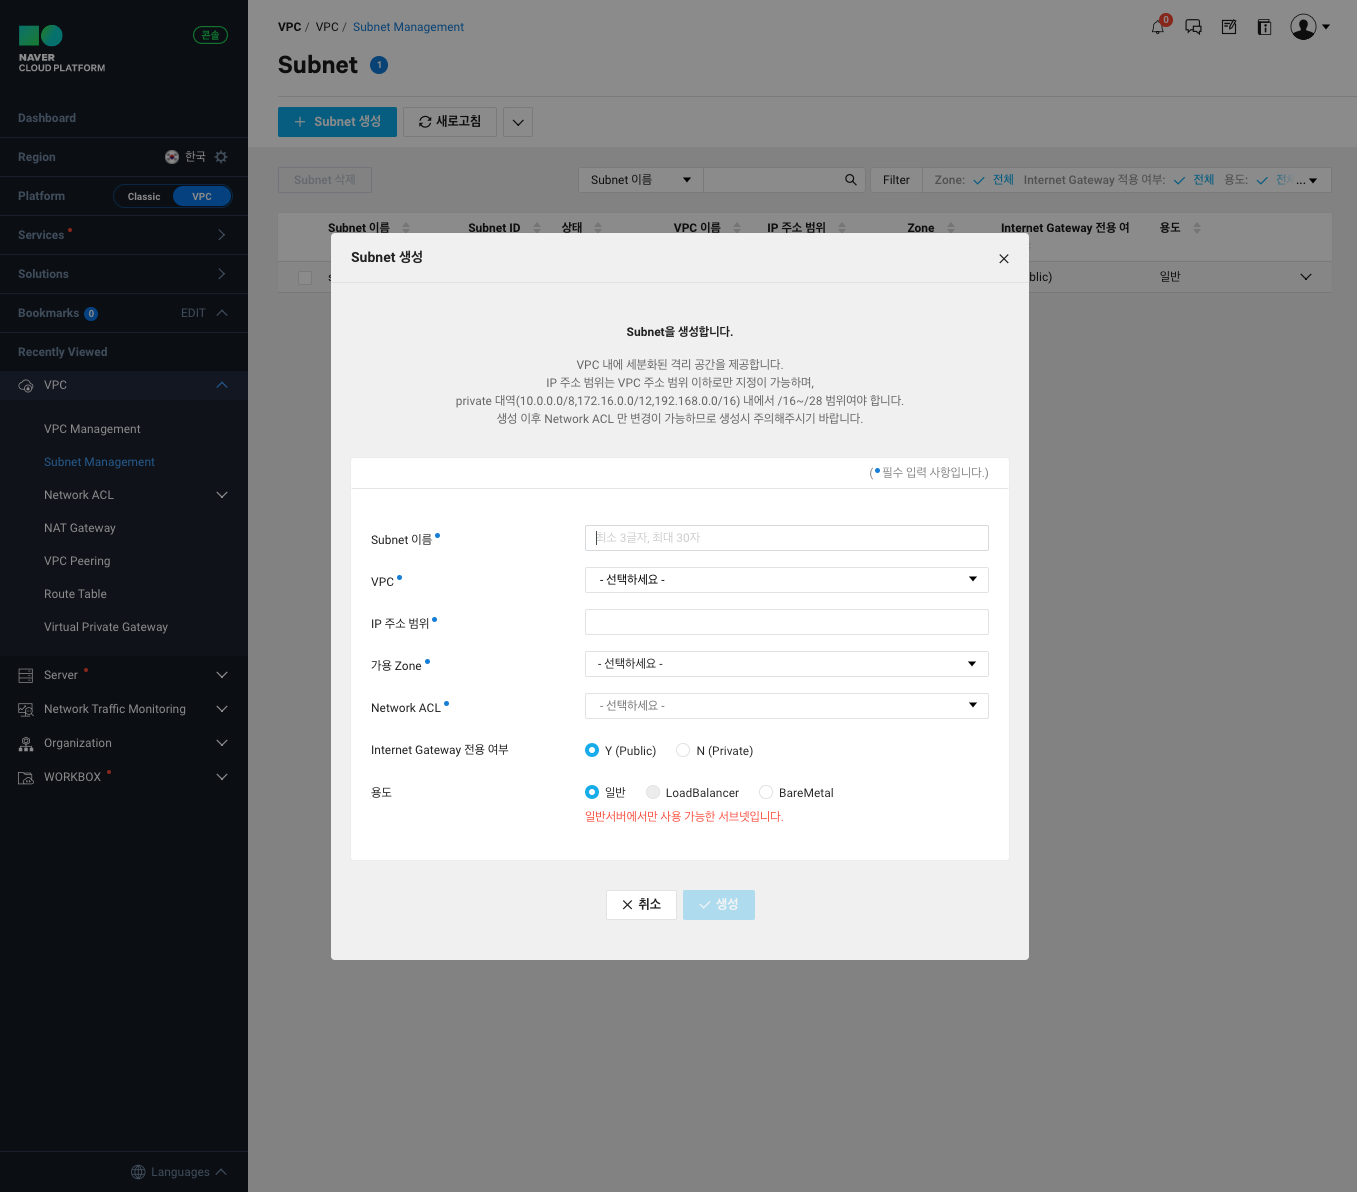
VPC 생성
기존에 생성된 Public IP 와 Server 연결
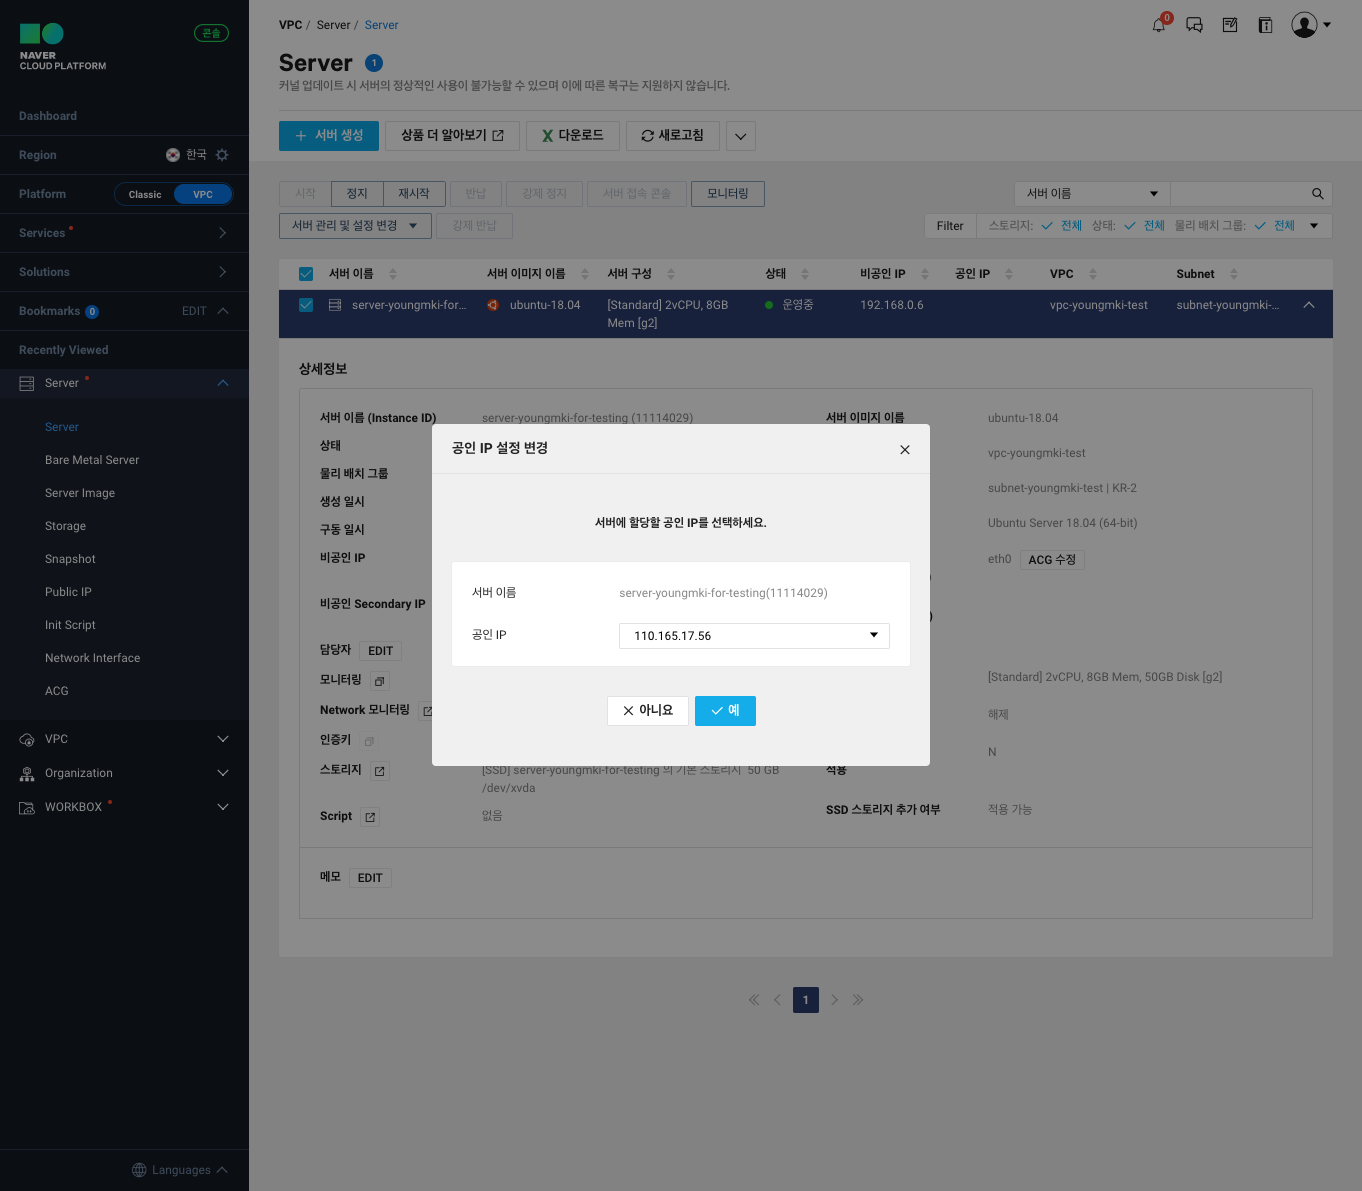
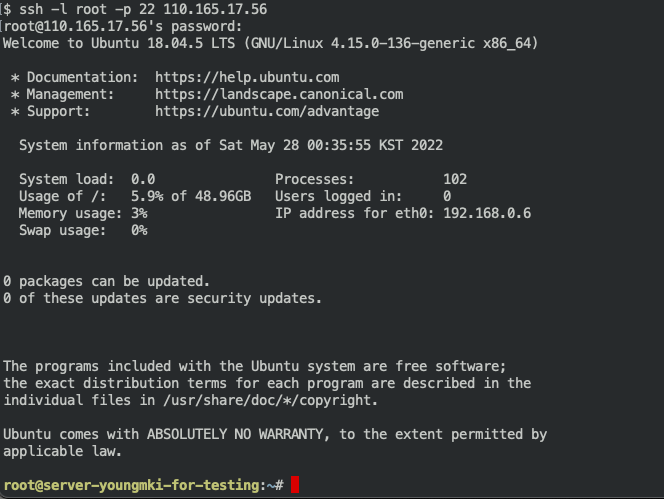
공인 IP를 통한 Server 접근
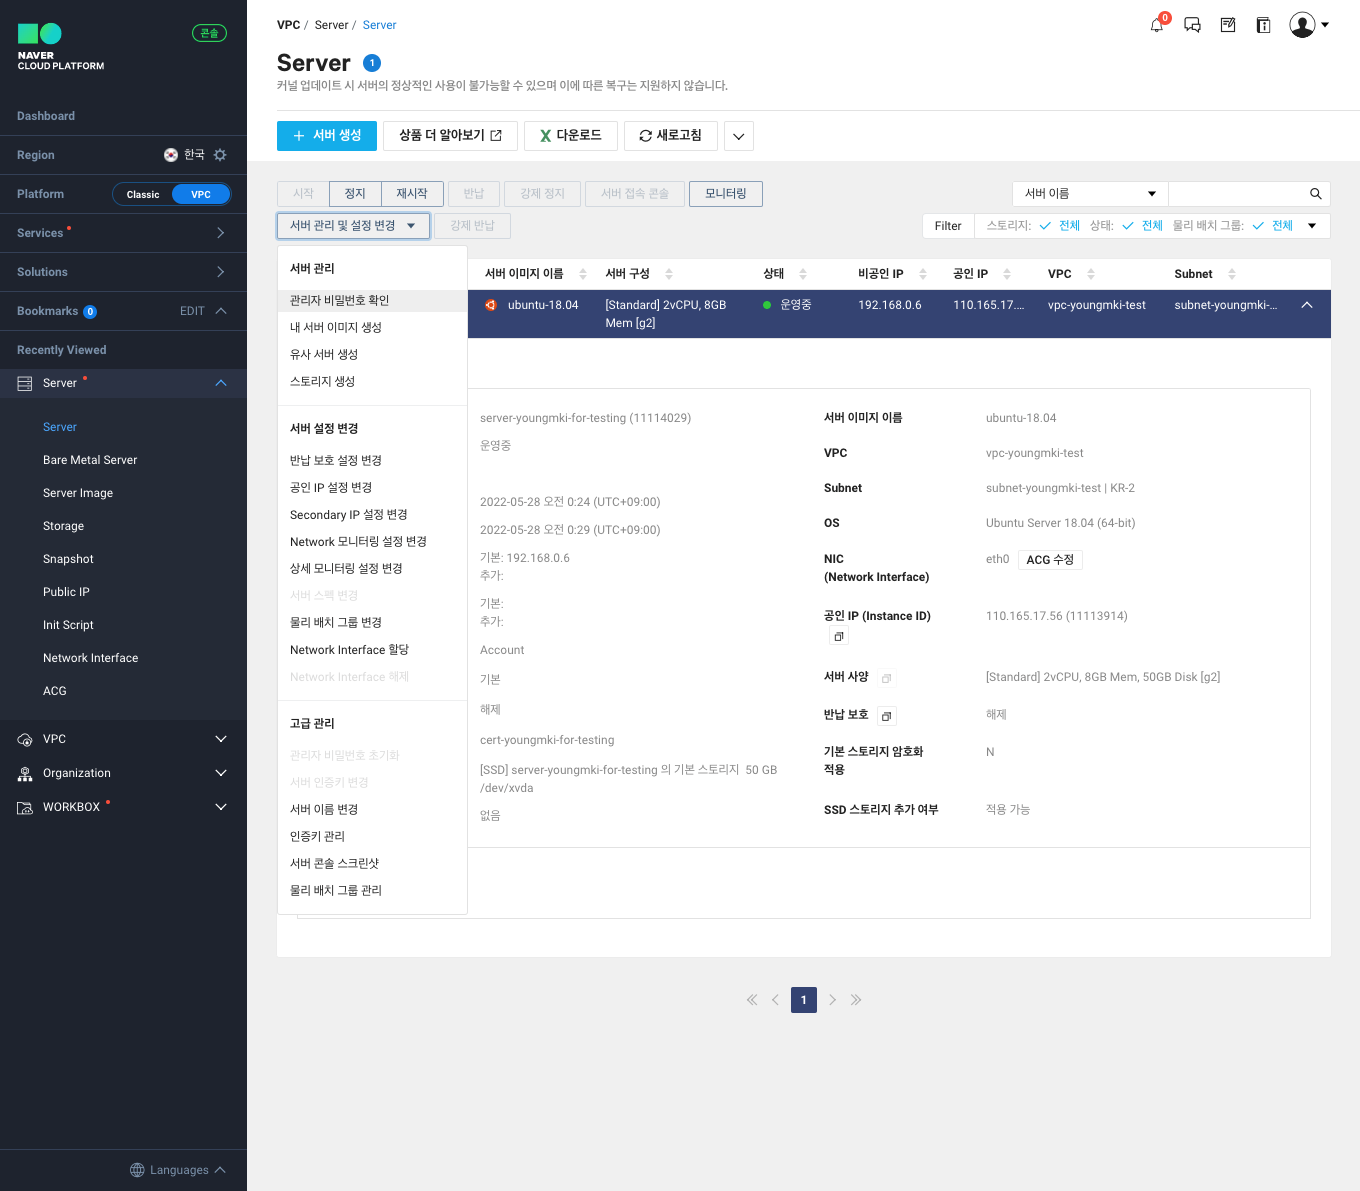
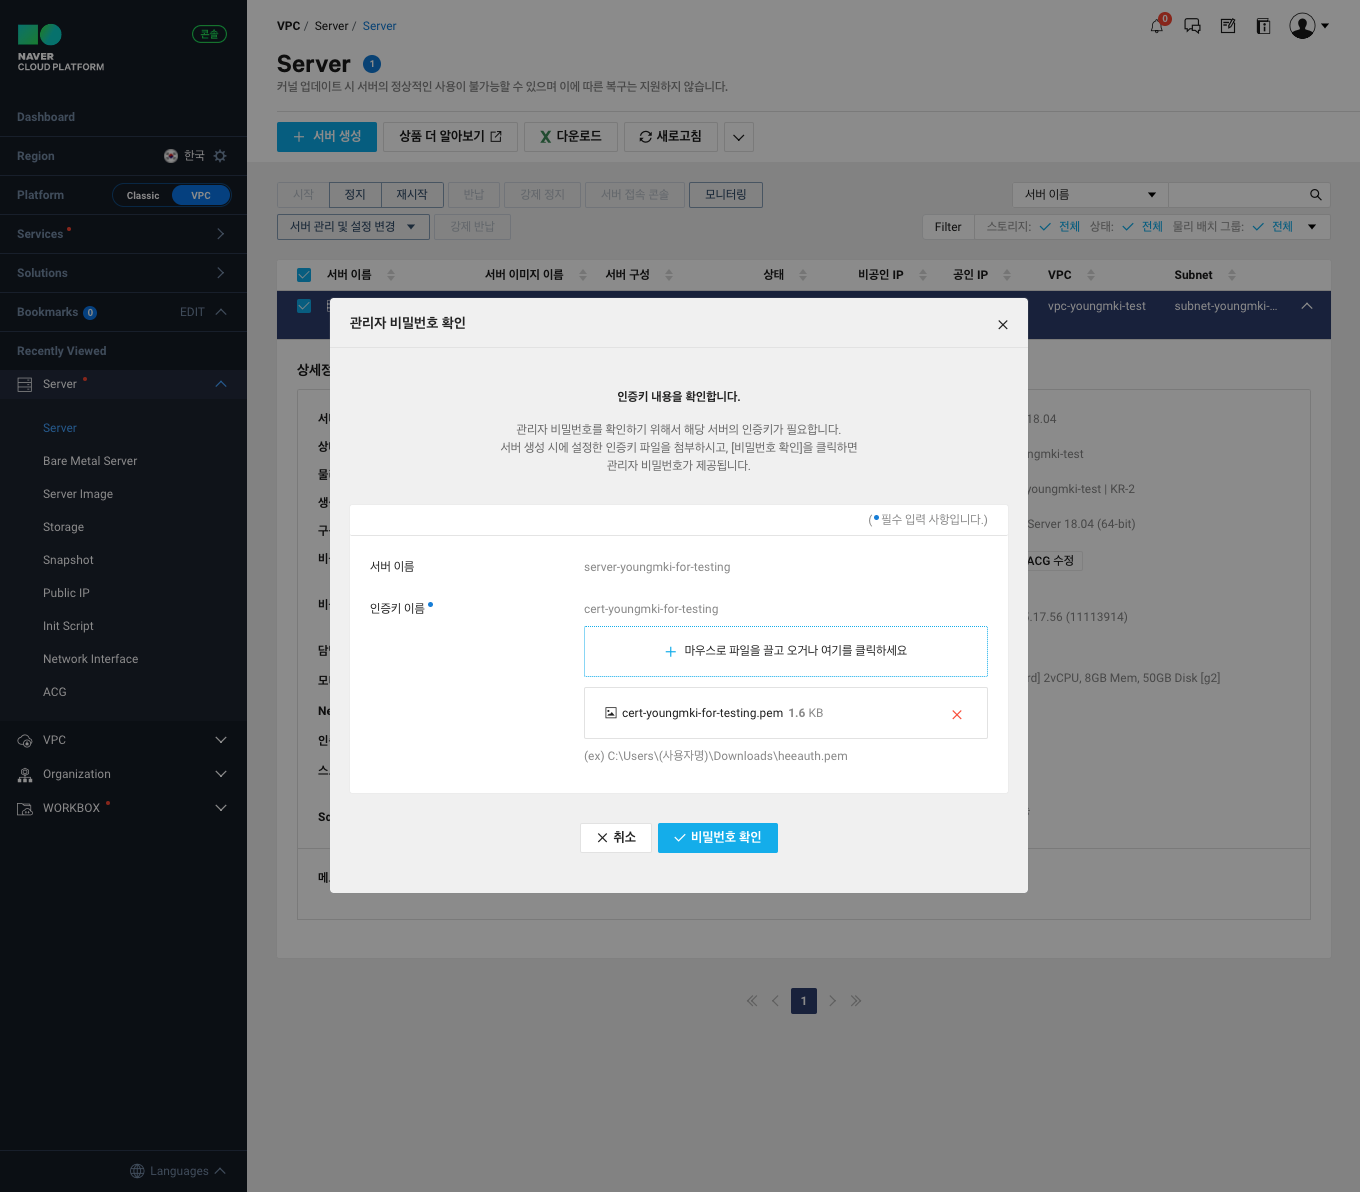
관리자 비밀번호 변경
$ root@server-youngmki-for-testing:~# passwd
$ New password:
$ Retype new password:
$ passwd: password updated successfully'DevOps > Cloud Service' 카테고리의 다른 글
| [SageMaker studio] Data Wrangler flow (0) | 2022.09.08 |
|---|---|
| [Boto3] S3 bucket 생성 (0) | 2022.09.07 |
| [Boto3] S3 bucket 나열 (0) | 2022.09.07 |
| awscli 1.25.17 requires botocore==1.27.17, but you have botocore 1.27.66 which is incompatible. (0) | 2022.09.06 |